Search for answers or browse our knowledge base.
In This Article…
Need Support?
Contact Support
Share or Unshare Items in the Client Portal
You can share items such as invoices, calendar events, tasks, notes, documents, messages, and forms with your clients via the client portal.
Watch a Video
The shared file icon displays to the far left of any item shared via the client portal. ![]()
Note: Before sharing items with the client in the client portal, you must enable the client portal for that matter.
Share or Unshare an Invoice
From Matter Details
To share an invoice via the client portal:
- From the left navigation panel, click Matters.
- On the Matters screen, double-click the matter and scroll down to its summary section.
- From the tabs on the Matters summary, click Billing.
- From the tabs atop the Billing screen, click Invoice.
- On the Invoice tab, single-click an invoice to highlight it and click on the three dots at the end of the row.
- From the drop-down, click Share via Client Portal.
If the invoice was not Final, the Share via Client Portal message box reads: This is an Unfinal invoice. Invoice will be marked as Final once shared. Continue?Note: If your firm previously shared the invoice, the drop-down displays the option to Unshare via Client Portal. - Click Yes.
The system adds the invoice to the Client Portal and sends an email notification to the client. The Share via Client Portal message box reads: Invoice has been shared successfully. The shared file icon displays to the far left of the row.
From Billing
To share an invoice via the client portal:
- From the left navigation panel, click Billing.
- From the Billing menu, click Invoices.
- On the Invoices screen, single-click an invoice to highlight it and click on the three dots at the end of the row.
- From the drop-down, click Share via Client Portal.
- If the invoice was not Final, the Share via Client Portal message box reads: This is an Unfinal invoice. Invoice will be marked as Final once shared. Continue?
Note: If your firm previously shared the invoice, the drop-down displays the option to Unshare via Client Portal.
- Click Yes.
The system adds the invoice to the Client Portal and sends an email notification to the client. The Share via Client Portal message box reads: Invoice has been shared successfully. The shared file icon displays to the far left of the row.
Share or Unshare an Event, Task, or Note
To share an event, task or note via the client portal:
- Add or edit an event, task, or note.
- Under the applicable screen select the item you wish to share and click on the three dots at the end of the row.
- From the drop-down select Share via Client Portal.
Note: If your firm previously shared the item, the drop-down displays the option to Unshare via Client Portal.
- The shared file icon displays to the far left of the row.
Share or Unshare a Document
- Add or edit your document.
- Click on the three dots to the right of the document and from the drop-down, select Share via Client Portal.

The Share File message box reads: The document has been shared successfully.Note: If you previously shared the item, the drop-down displays the option to Unshare via Client Portal.
- If in grid view, the shared file icon displays to the far left of the row.
Share an Intake Form
You can share forms with clients through the client portal to collect and populate needed information.
This option will only be available if, when choosing your processing rule you choose to associate this form with an existing matter that has an activated client portal. Also, the “Forms” box needs to be checked off in client portal permissions for the matter. Learn more about Client Portal Access.
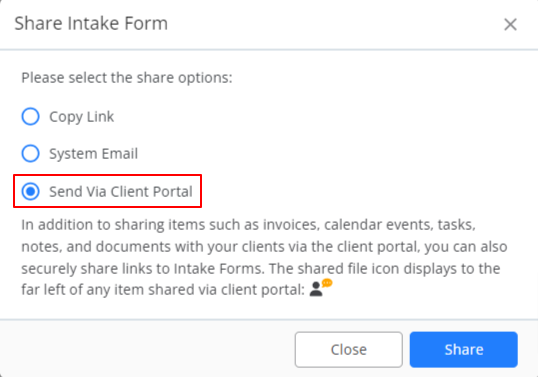
-
- Choose Send via Client Portal.
- Select Share.
The client will then be able to access the form from their portal by navigating to the top right of their client portal page.

Once they select the form from the drop-down, they can begin filling it out and submit.
In This Article…
Need Support?
Contact Support