Search for answers or browse our knowledge base.
Matter Type Project Management Workflow
Within each practice area or area of law, there are several matter types that require different tasks, events and restrictions and workflow statuses or stages. You can create workflows using a pre-made template or customize your own. Each board is specific to an individual matter type.
Note: Before using Project Management, make sure you have enabled Project Management for all new matters under Setup > Firm Settings > Firm Preferences and for each matter under Matters > Settings > Workflow.
Create Project Management Workflow
To create a new Project Management Workflow:
- From the left navigation panel, click Practice.
- From the Practice menu, click Project Management.
- From the tabs atop the Project Management screen, click + Add New Board.
- In the Add Board panel, give your new Workflow a Matter Type Title and Description.
Your workflow will be added to the list.

On the Workflow screen, you can perform the following actions:
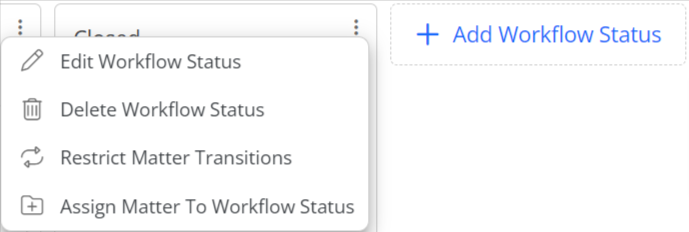
-
- Add Workflow Status
- Edit Workflow Status
- Delete Workflow Status
- Restrict Matter Transitions
- Assign Matter to Workflow Status
-
Add Workflow Status
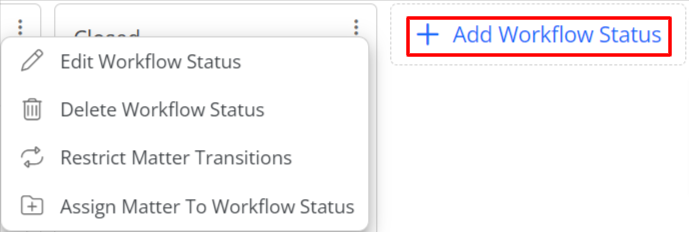
By default, the workflow status screen has three swim lanes, Open, In Progress, and Closed. To add another workflow status:
- From the left navigation panel, click Practice.
- From the Practice menu, click Project Management.
- On the Project Management screen, select the workflow board to which you want to add a workflow status.
- To the right of the board selected, click +Add Workflow Status.
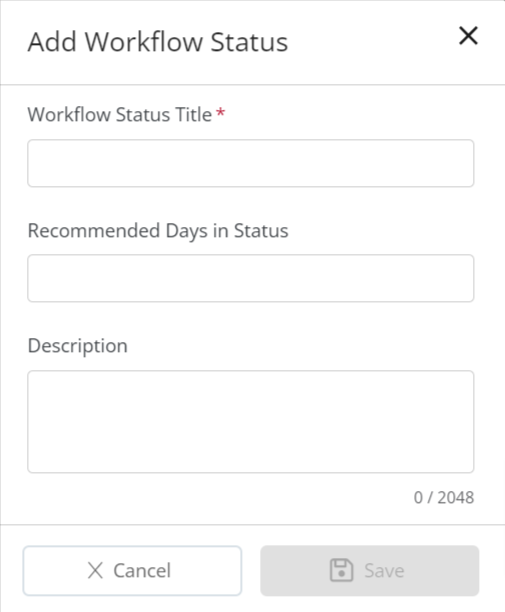
- In the window that opens, give your workflow status a title.
Note: This is a mandatory field. - You can also choose to enter the Recommended Days in Status and add a Description to the status.
- Once you’ve made your entries, click Save.
Your workflow status will be added as a swim lane on the board. - To add the status to the correct stage, drag and drop it to its place on the board.
Edit Workflow Status
To edit a workflow status:
- From the left navigation panel, click Practice.
- From the Practice menu, click Project Management.
- On the Project Management screen, select the workflow board which you wish to edit and click on the three dots at the top of that swim lane.
- From the drop-down, select Edit Workflow Status.
- In the window that opens, you can change the workflow status title.
- You can also choose to enter the Recommended Days in Status and add a Description to the status.
- Once you’ve made your entries, click Save.
Delete Workflow Status
To delete a workflow status:
- From the left navigation panel, click Practice.
- From the Practice menu, click Project Management.
- On the Project Management screen, select the workflow board from which you wish to delete a status and click on the three dots at the top of that swim lane.
- From the drop-down, select Delete Workflow Status.

- If you are sure you wish to delete the status, click Delete, if not, click Cancel.
If you selected Delete, the workflow status will be removed from the board.
Restrict Matter Transitions
Matters can be transitioned or moved to any workflow status. If you wish to control and restrict the transition of your matters from a particular Workflow Status to another:
- From the left navigation panel, click Practice.
- From the Practice menu, click Project Management.
- On the Project Management screen, from the drop-down, select the workflow board where you want to restrict matter transitions.
- Select the status that you wish to restrict and click on the three dots at the top of that swim lane.
- From the drop-down, select Restrict Matter Transitions.
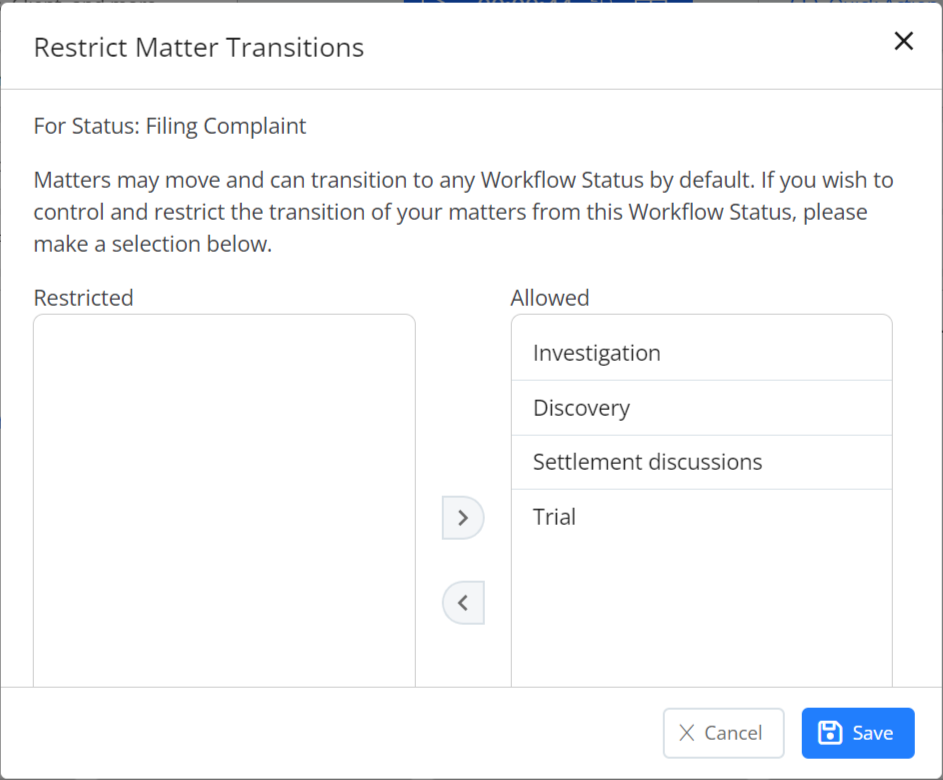
- In the window that opens, select the status from the allowed list and use < arrow to move it to the restricted list.
- Once you have selected the status(es) where you do not want the matter in this workflow status to be moved, click Save.
- When you go that board and try to move a matter, the status will get highlighted in red and the matter will not move to the restricted status.

Learn how to manage matters on a workflow status.