Search for answers or browse our knowledge base.
Custom Import Your Soft Cost Expenses
Software such as Lexmark, Ricoh, Canon, Copitrak, Papercut, and Xerox can track certain soft cost expenses, such as photocopies and printing. The software produces .txt files you can download to import the data into the application.
Custom importing your soft costs involves two steps:
- Add the import definition.
- Import the custom file containing your soft cost expenses.
Import Your Soft Cost Expenses
To import your soft costs expenses:
- Add your import definition.
- From the left navigation panel, click Billing.
- From the Billing menu, click Time/Expense.
- From the toolbar atop the Time/Expense screen, click Action > Custom Import.
- From the Custom Import wizard Import Types drop-down, click the proper import definition for your data.
- In the lower right corner, click Next.
- To Select the file you want to import, click Choose File.
- Browse for the file you want to import.
- Select the file.
The file name populates the field. - In the lower right corner, click Upload.
The import data displays for review.
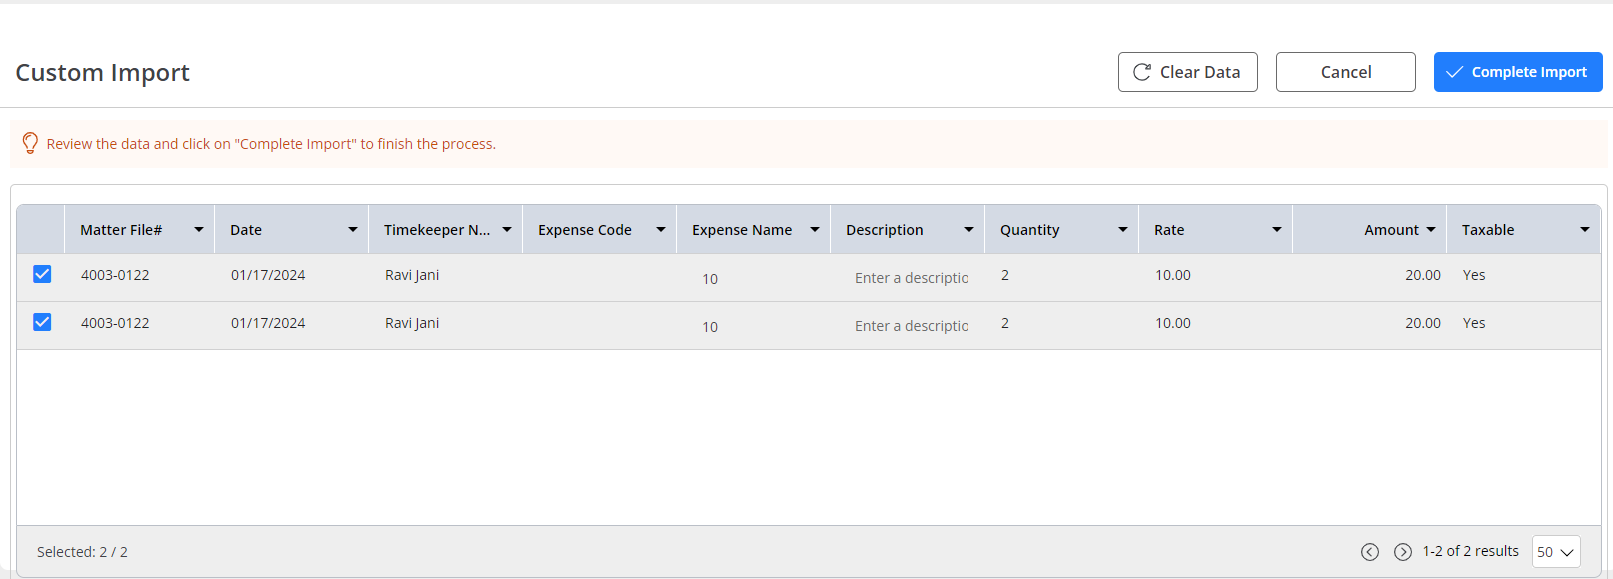
- Check or uncheck items you want, or do not want, to import.
- To edit the Expense Name and Description fields, to the far right of the applicable row, click the orange pencil.
Once items are imported into the application, changes must be made individually.
- In the lower right corner, click Complete Import.
A message displays: Data has been imported. Please delete the desktop import file used to prevent accidental import of the same data again.The system returns to the Time and Expense screen which displays your imported items.
Errors and Exceptions
The system will prompt you if errors arise.
For example, the designated matter or timekeeper may not exist. You can always cancel the import to make any needed updates within the application before importing.
Import Rules
Follow these import rules to ensure a successful file upload.
| Field | Import Rules |
|---|---|
| Date |
|
| Timekeeper Initial |
|
| Expense Code/Name |
|
| Quantity |
|
| Rate |
|
| Amount |
|
| Description |
|
| Tax Status |
|
Export Client-Matter
To export matter list from the application:
- From the left navigation, click Matters.
- From the tabs atop the Matters screen, click Export.
- On the Export Grid that opens, from the pages drop-down, select Custom.
- In the next field, enter the From and To page numbers that you wish to export.
- From the Export format drop-down, select CSV(.csv), and click Export.
- Open the CSV file and remove all the columns except CLIENT NAME, MATTER NAME, MATTER FILE#, CLIENT ID
- Move this file to the designated folder required by your printing tool.