How Can We Help?
Search for answers or browse our knowledge base.
Use the Desktop Time Tracker
The desktop time tracker allows you to keep track of your time for any activity that you may be working on.
Watch a Video
Install the Time Tracker
To install the time tracker:
- From the navigation panel, click Time.
- From the time menu, click Timesheet.
- From the tabs atop the timesheet, click Tracker.
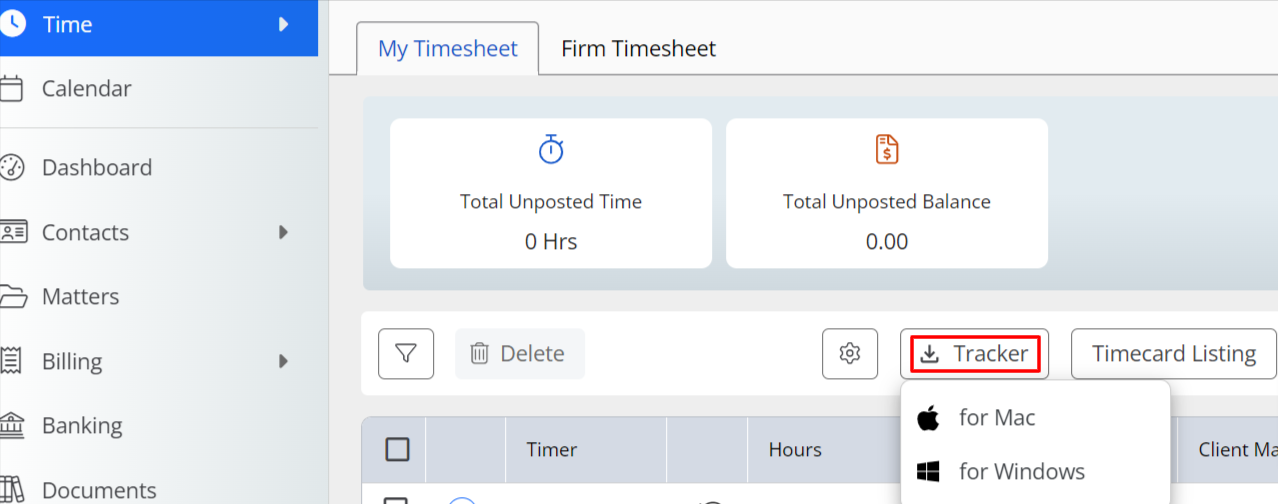
- From the options in the drop-down, select the one appropriate to your operating system.
- After it gets added to your downloads, complete the installation.
-
On the login page, login with your Rocket Matter credentials.

- To let Rocket Matter Track have access to your files and content, click Allow Access.
Your desktop time tracker is installed to your device.
Tracking Time using Rocket Matter Track
Once your Rocket Matter Track is installed, you can either use the Stopwatch or the Pomodoro timer to track any billable activity.
Using the Stopwatch
- On your desktop tracker, from the left-hand panel, select the Stopwatch icon.
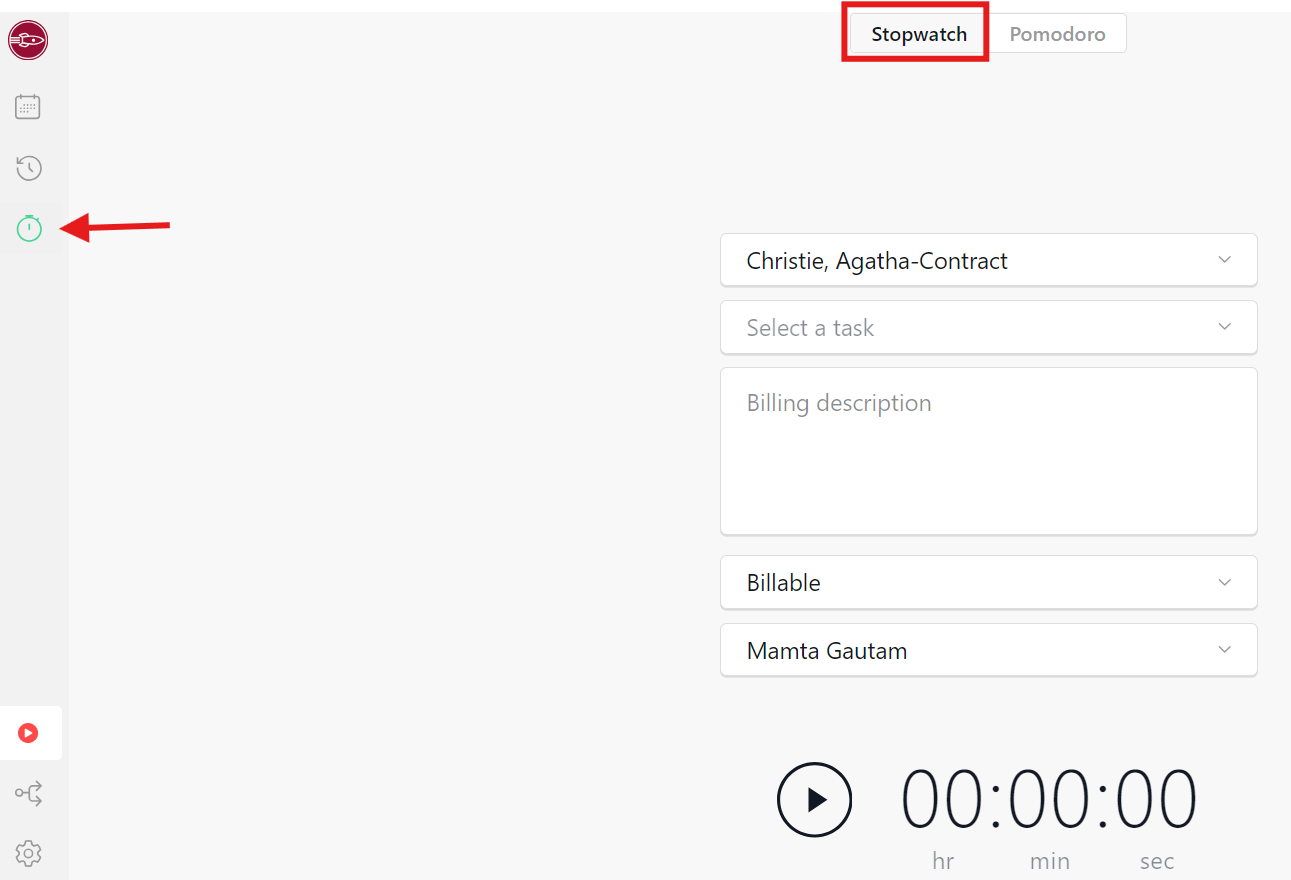
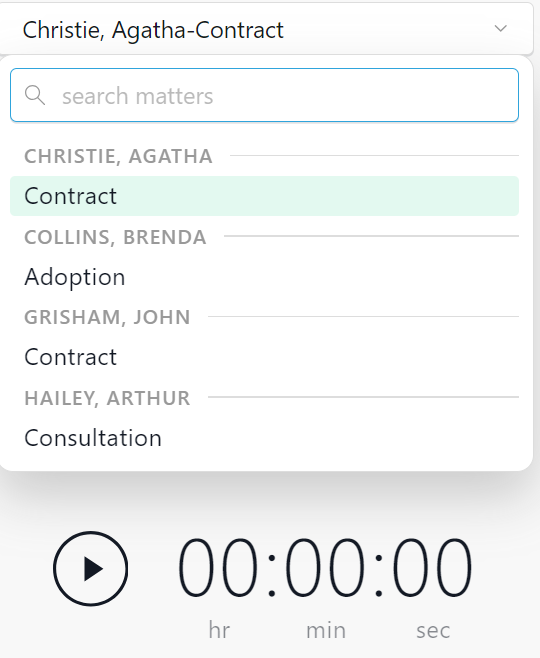
- In the search matter field, enter the first few letters of the matter name and from the drop-down, select the associated matter.
Although this is an optional field, the best practice is to associate the timer.
- In the task field, select a task from the drop-down or select None.
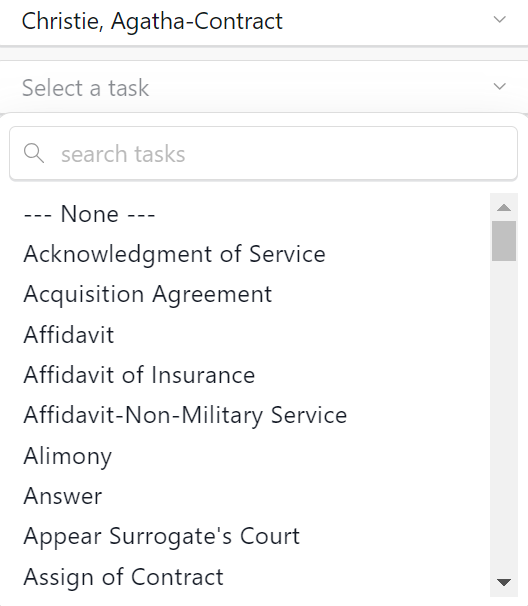
- From the billing description drop-down, select from Billable, Non Billable and No Charge.

- Once you have entered the details, press the play icon to start the timer.
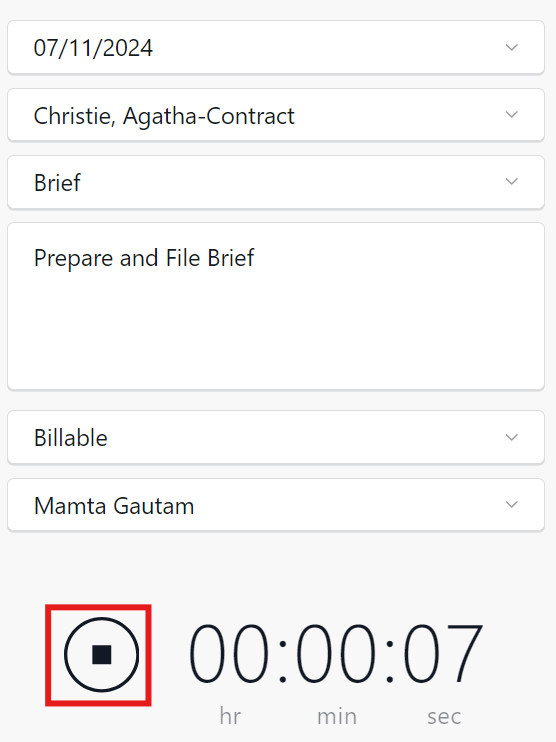
Note: Once you press start in the Rocket Matter Track App, a new timer will automatically open in your Rocket Matter timecard listing and run simultaneously.
![]()
5.On the timecard listing, you can make edits to the entry or create timecards.
Edit Stopwatch Entries
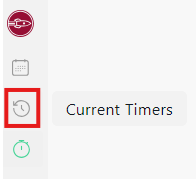
- To edit the stopwatch entries, while in your Rocket Matter Track, from the navigation panel, click on the Current Timers icon.
- From the list of time entries that display, click on the entry you wish to edit.
- On the Edit Timer that displays, make any required edits.
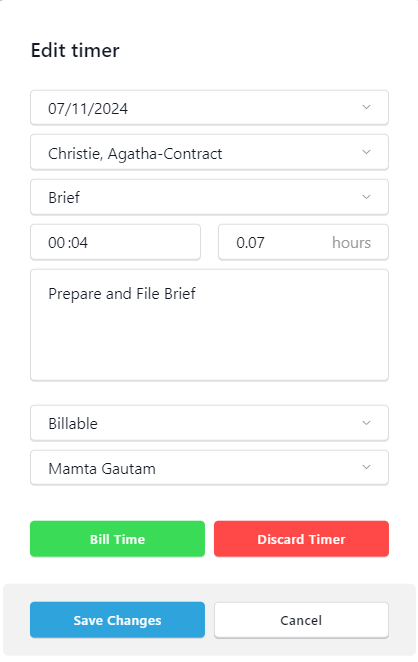
Here you can edit the date, matter name, task, timer units or description, billing status, or timekeeper. - Use the edit timer to Bill Time, Discard Timer, Save Changes, or Cancel to go back.
- BILL TIME: You can capture time from your timer by clicking ‘Bill Time.’ Once you’ve chosen the bill time option, the timer will be removed from the list of available timers in both Rocket Matter and the Rocket Matter Track app, and it will be added to the pending billable activity for the assigned matter.
- DISCARD TIMER This will ‘discard’ and delete the timer from both Rocket Matter, and the Rocket Matter Track App. Discarding (Deleting) a timer in Rocket Matter, will also result in the deletion of the timer in the Rocket Matter Track App.
- SAVE CHANGES: This will save all changes made, if applicable. The timer will remain the list of current timer(s).
- CANCEL: This option will cancel and close the window; no changes will be saved.
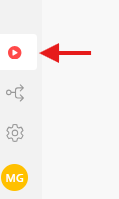
- You can also allow automatic tracking, by clicking the play arrow in the navigation panel.
The red flashing light will indicate that tracking has begun.