How Can We Help?
Search for answers or browse our knowledge base.
Import Your Contacts
To save time and effort, you can import your contacts directly into your system.
Complete the Data Import Spreadsheet
To import your contacts:
- Download the Contact Data Import Spreadsheet to your preferred location. For a smooth import process, do not change the file name or format.
- Open the spreadsheet.
- At the bottom of the spreadsheet, click Data Entry Instructions.
- On the Data Entry Instructions tab, read the instructions.
- Click Contacts Data.
- On the Contacts Data tab, in the upper left corner, click inside cell A2.
- Click on the Contact Type field’s drop-down and select the contact type. If the contact type does not equal client, you can leave this field blank.
- Enter your contacts’ information in the remaining fields.
Important: To ensure the State field populates upon import, be sure to complete the Country field. - In the upper left corner, click Save.
Close the spreadsheet.
Import Your Contacts
- In the upper right corner of your screen, click Quick Action.
- At the bottom of the drop-down, click Import Data.

The Custom Import screen opens.
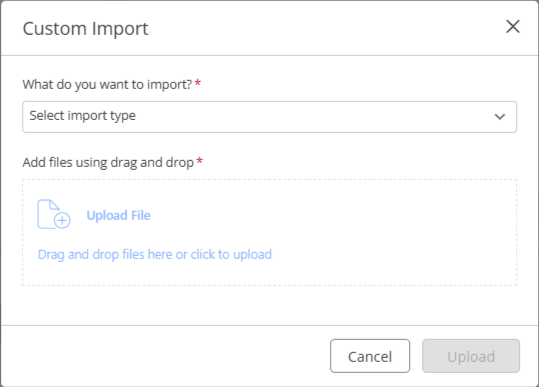
- From the What do you want to import field drop-down, select Import Clients/Contacts.
- In the Add files using drag and drop field, click Upload File or Drag and drop the file from your browser.
On the browser window, locate the spreadsheet and double-click it.
The file name populates the Choose File field. - In the bottom right corner, click Upload.
The screen refreshes, displaying your contact data. - If there are issues with the data, the Total Errors, Total Warnings and Total Auto-Fix fields display tallies.
| Total Errors | Items that need to be addressed and fixed prior to export |
|---|---|
| Total Warnings | Issues that the import identified and can correct for you |
| Total Auto-Fixes | Items the system already fixed |
- Click the colored triangle to the left of any field for information regarding how to address the warning, then apply the fix. If you are unable to fix an error at this time, uncheck the box beside the client’s name to remove them from the import.
- In the upper right corner of the screen, click Complete Import.
A message box displays: Are you sure you want to complete the import? - Click Yes.
A message displays: Import data has been completed successfully. - Click Close.
- From the left navigation panel, click Contacts.
- On the Contacts screen, review your contacts to confirm the import’s success.