How Can We Help?
Search for answers or browse our knowledge base.
Manage Your Views
The views area, a library of all default and custom views available throughout the application, gives you the ability to easily configure custom views without having to navigate the entire system. The views area allows you to add, edit, and organize your views.
Access Saved Views

To access your saved views:
- From the left navigation panel, click Views.
- On the Views page, to quickly access the views you have created in other sections of the application:
-
- Type in the search box.
- As you begin typing, all saved views with the letters entered will appear in the drop-down.
- Select the view you would like to access by clicking on it.
- Your selected view will show to the right. You can select more than one view and switch between your selected views.
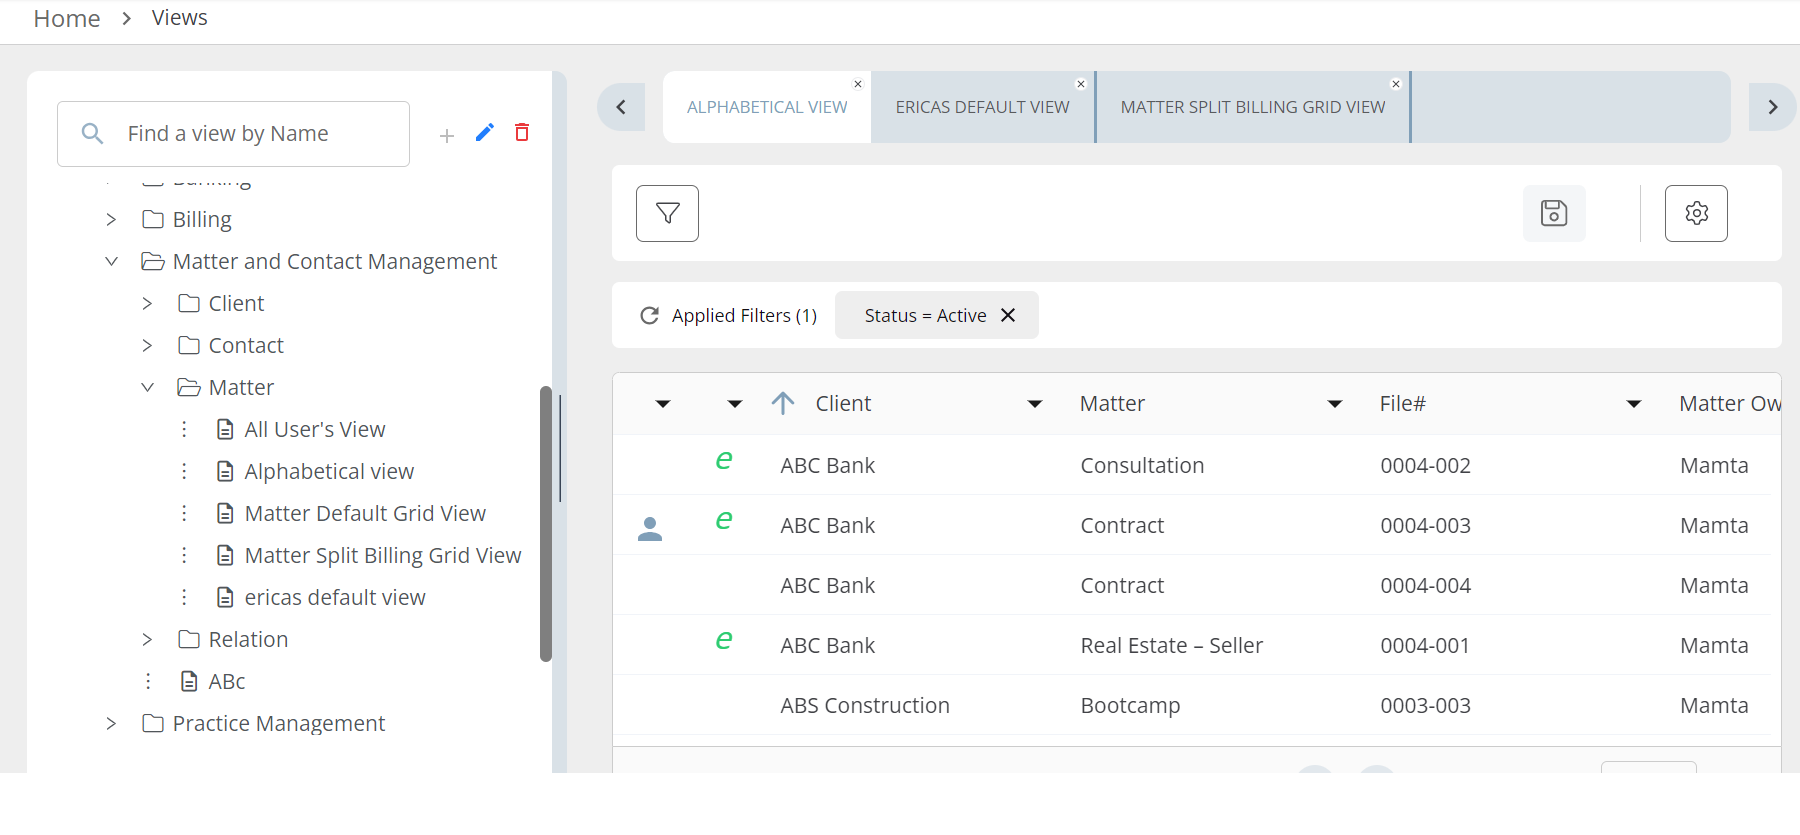
- Find your views in each section.
- To the left of the section name, click the arrow.
- On the expanded list, click the area where your custom view is located.
- To the left of the selected area, click the arrow.
- From the list of views, select the view you would like to access by clicking on it.
- Your selected view will show to the right. You can select more than one view and switch between your selected views.
- Type in the search box.
Rename a View
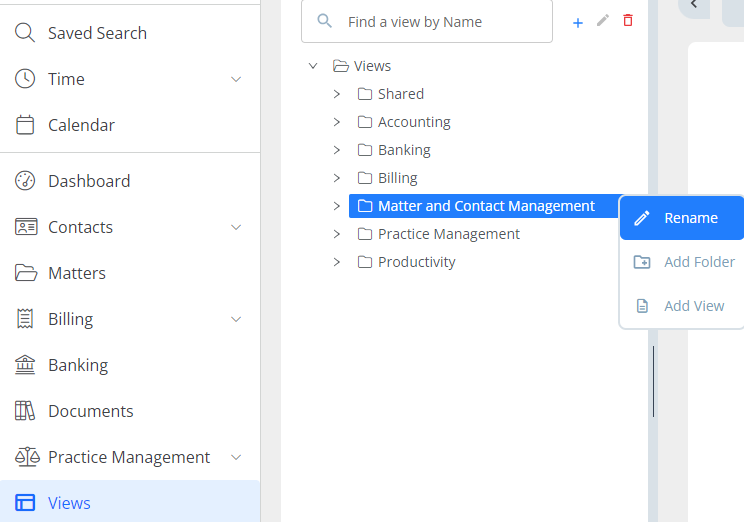
To rename a view:
- From the folder of views, select a view by clicking on it.
- Click on the burger menu (three dots), at the end of the row.
- From the drop-down list, select Rename.
- You can now enter a new View name by deleting the previous name and typing your preferred name.
Note: You cannot rename system-defined folders.
Add a Folder
You can add sub-folders within the system-defined folders.
- Click on the folder within which you wish to add a sub-folder.
- Click on the burger menu (three dots), at the end of the row.
- From the drop-down list, select Add Folder.
- In the blank entry field beside the folder icon, enter the folder name.
Add a View
There are several ways in which you can customize and save views in NextGen.
To add a view from the Views section:
- From the list of folders, select the folder in which you want to add the view by clicking on it.
- Click on the + icon next to the search field. or
- Click on the three dots beside the folder and from the drop-down, select Add View.
- You can now configure your view and give it a name and description. You can also choose to keep your view private, share it with selected users in the firm, or share it with all firm users. You can set your custom view as default to get back to when you log in to your CosmoLex application.
You have the flexibility to customize the resource, fields, filters, sorts, and preview and complete the details.
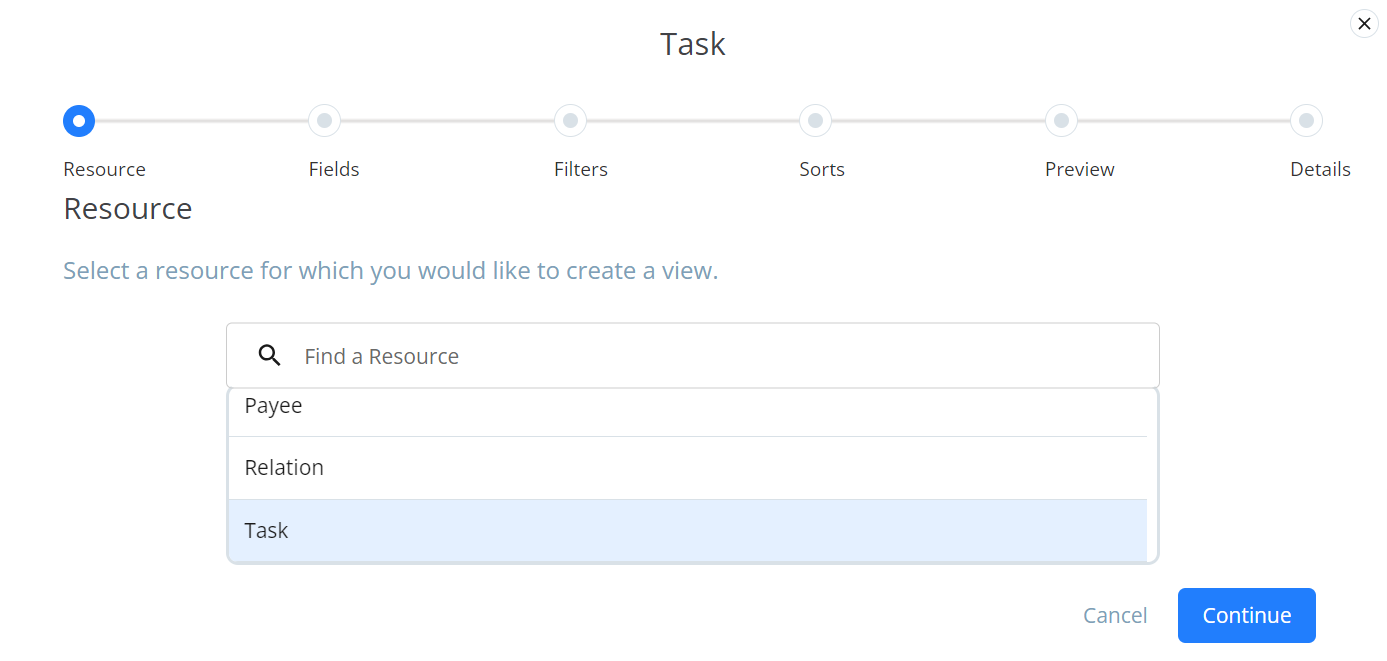
Select a Resource
Note: Resources are the areas that you can configure by adding and organizing columns to create your own way of looking at data.
-
- You can type in the search bar, or from the list of resources, choose the resource you wish to customize by clicking on it.
- Once you have selected the resource, click Continue.
Add Fields
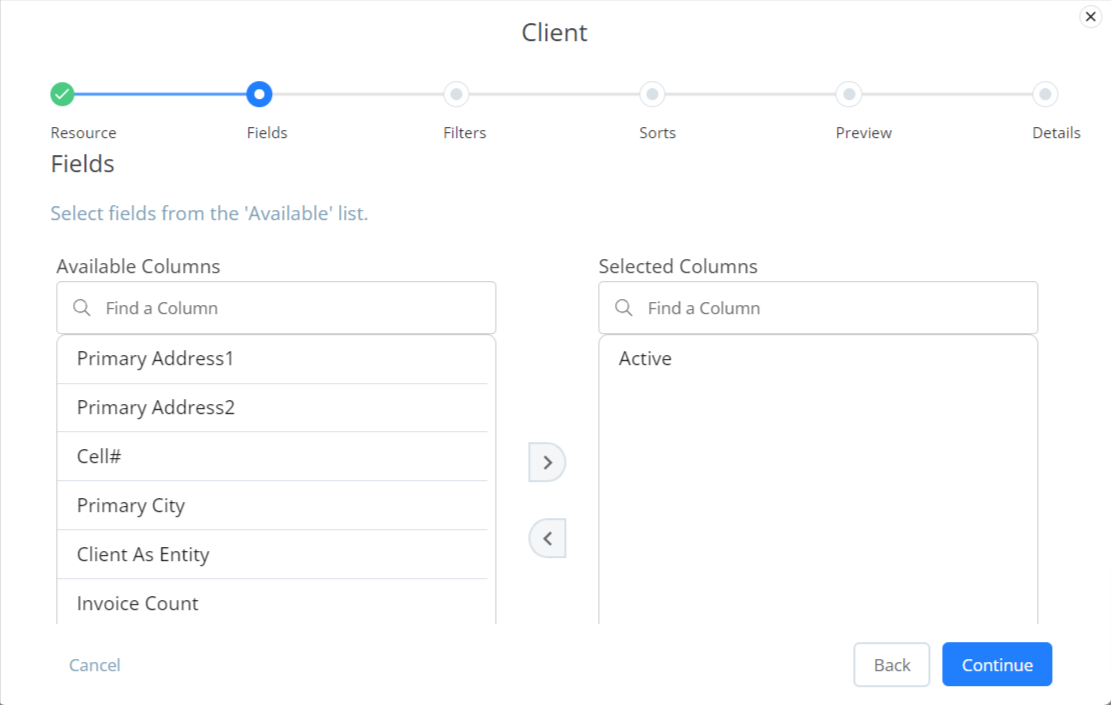
-
- From the Available Fields list, choose the field you wish to configure in your view.
- Click on the > arrow to move your selection to the Selected Column list.
- Once you have selected all the columns for your view, click Continue.
Select Your Filters
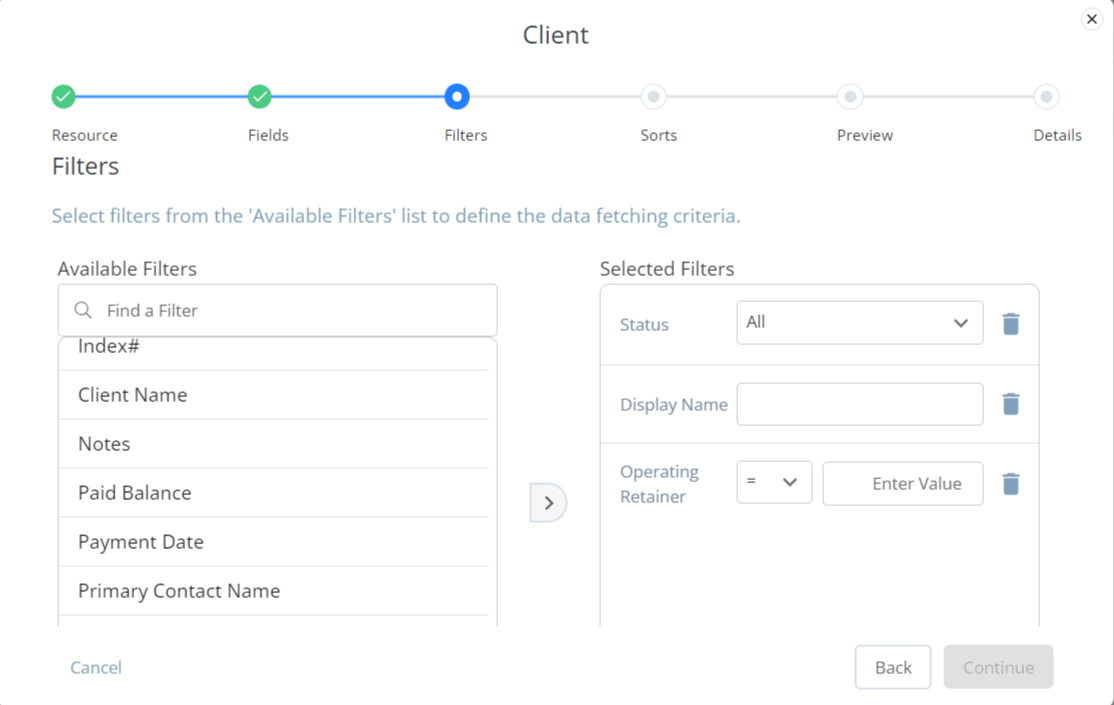
-
- From the list of Available Filters, select the filter you wish to use in your view.
- Click on the > arrow to move your selection to the Selected Filters list.
- Depending on your selection, you can type the filter name or select the option from the drop-down.
- Once complete, click Continue.
Select Sorts
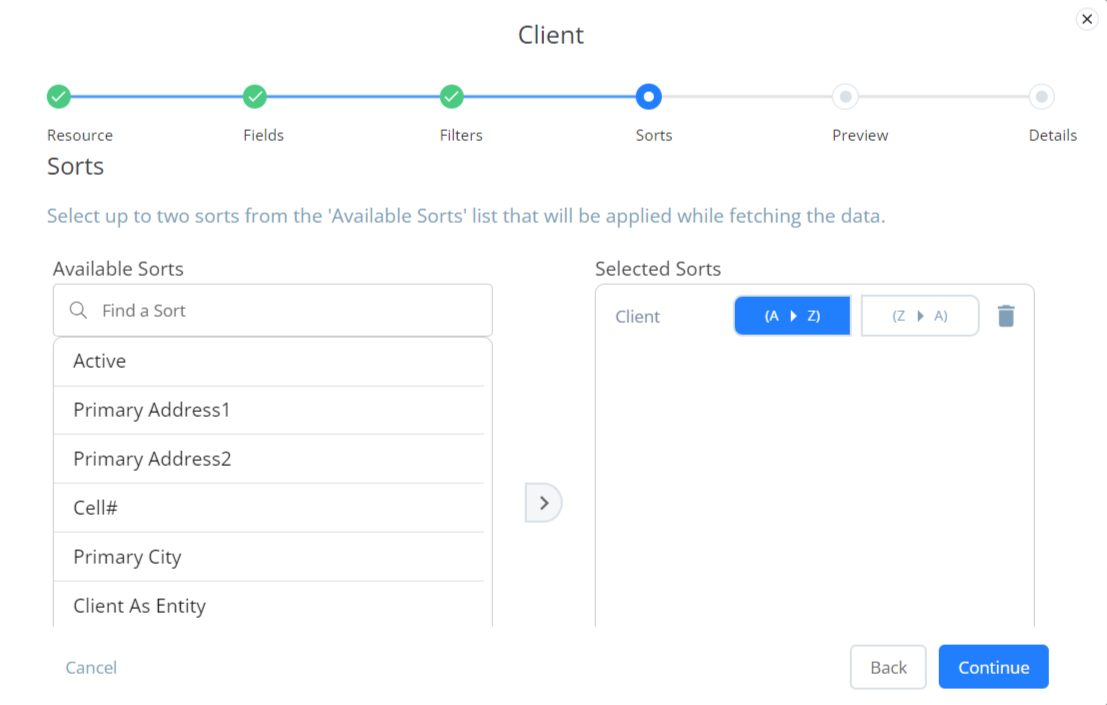
-
- From the ‘Available Sorts’ list, select up to two sorts that will be applied while fetching the data.
- Click on the > arrow to move your selection to the Selected Sorts list.
- Depending on the field selected, you can choose to sort by either entering your preferred sort or selecting from A > Z or Z > A.
- Once you have made your selection, click Continue.
Preview
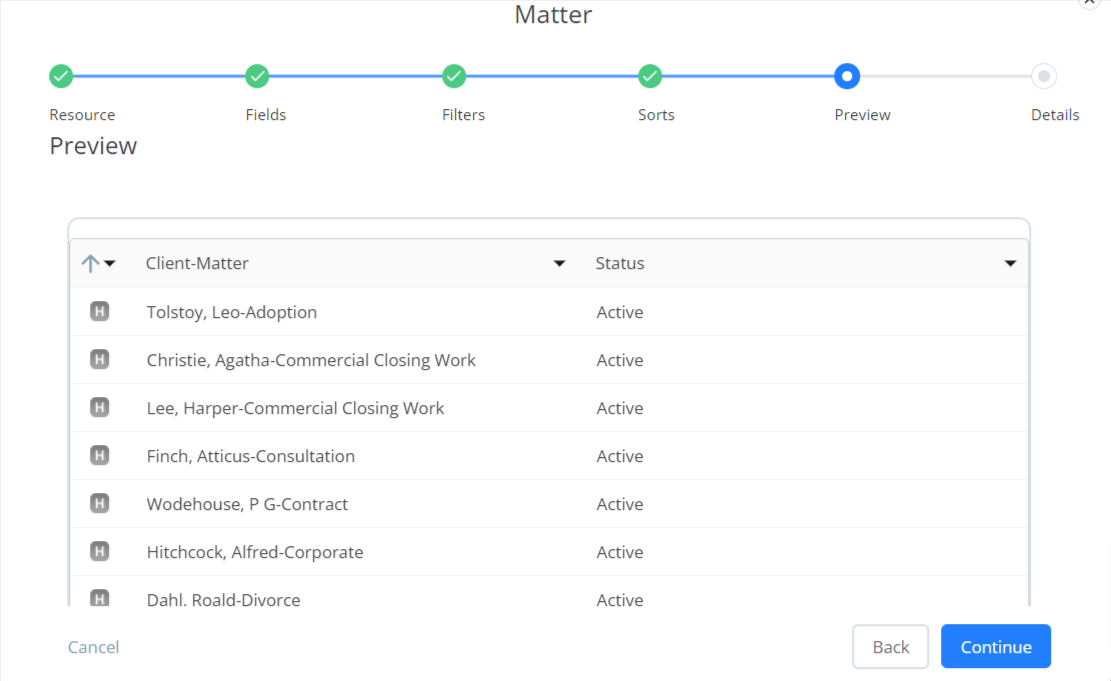
- Preview the view you have created, once satisfied, click Continue.
Add Details
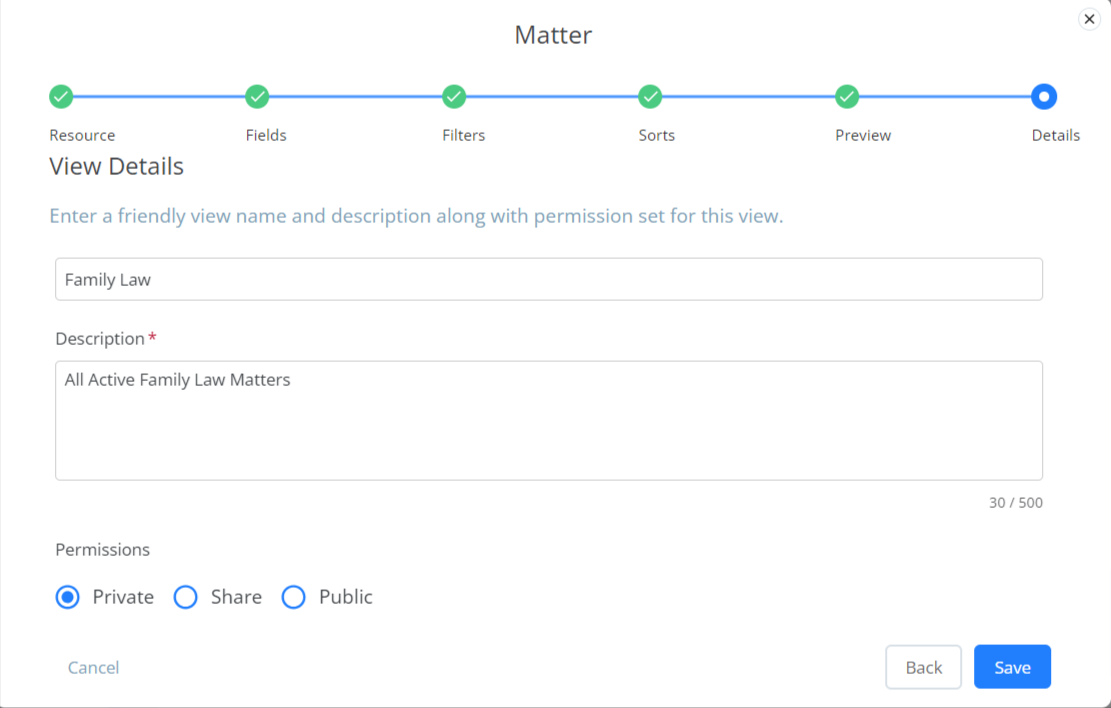
On the View Details page give your View a name and add a description.
-
- In the Description field, add a suitable description for your View.
- You can choose to keep this view Private, Share it or make it Public.
- Private: This view will only be visible to you when you set it as your default and log in. Nobody else in your law firm will have access to your view.
- Share: Selecting Share will expand the panel to allow you to choose users or roles with whom to share your customized view. You can give them access to a Read Only version of your view or permit them to make changes by selecting Read/Write.
- Public: This will give everyone in your firm access to your customized view.
- Once you have completed all the fields, click Save. To make changes, click on the Back button.

