How to Create an E-Sign Template with Dropbox Sign (Text E-Sign friendly)
Build a reusable e-sign template in Dropbox Sign that auto-fills client data and is ready to send by text and email.
Welcome to the E-Sign Setup Tutorial! Ready to start signing up new clients today?
Your Rocket Matter CRM includes a built-in integration with Dropbox Sign, the #1 e-sign provider. With this feature, your firm can quickly send out e-sign retainers via text message and email, saving valuable time and streamlining the client onboarding process.

Why Use E-Sign in Rocket Matter CRM?
- ✨ Seamless Integration: Quickly autofill client information from your CRM database.
- ⏱ Time-Saving: Send documents for signature in seconds, reducing administrative workload.
- Cost-Effective: Our Rocket Matter CRM offers volume discounts for the Dropbox Sign API version—you only pay per signature request sent, with no monthly service fee for setting up templates.
- No Separate Dropbox Sign Account Needed! Your CRM includes a Dropbox Sign account, so there’s no need to purchase one separately.
Prefer a visual guide?
For a step-by-step walkthrough, we recommend watching the instructional video before following the written guide below.
How to Set Up E-Sign Templates
Before sending an e-sign document, you'll first need to set up an e-sign template using Dropbox Sign’s embedded editor.
Step 1: Access E-Sign Settings
- Start by using the main navigation menu and going to Setup >E-Sign Settings
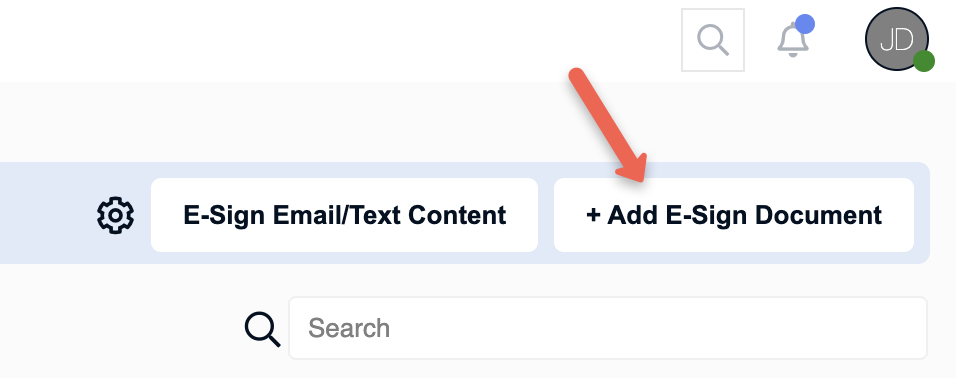
- Next, click the + Add E-Sign Document button in the upper-right corner
Step 2: Name and Upload Your Template
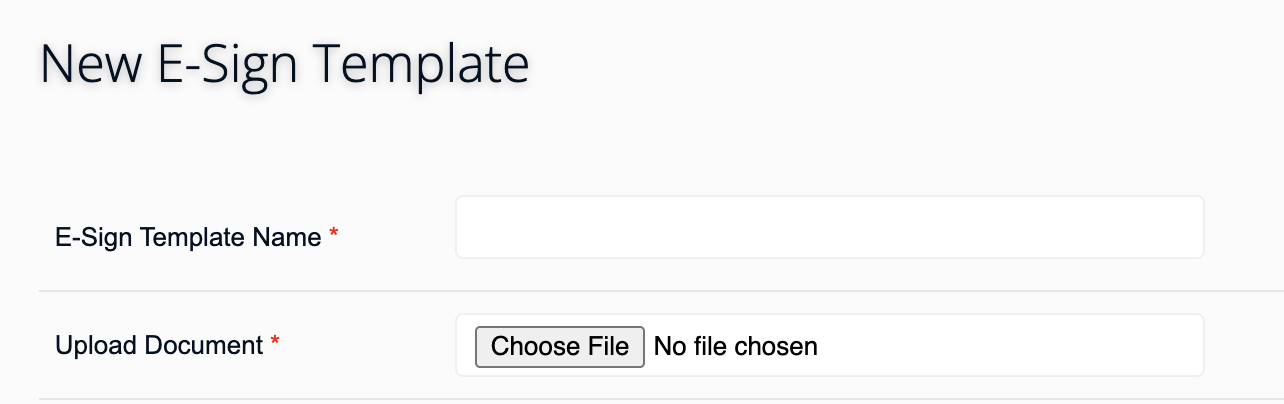
- In the new screen that appears, enter a name for your e-sign template in the "E-Sign Template Name field.
⚠ Note: Please refrain from using special characters (!@#$%^&*()_-"'<>+) in template names. - In the Upload Document section, click the Choose File button to select the file that will be used for your e-sign template.
Step 3: Choose Signers and CC Recipients
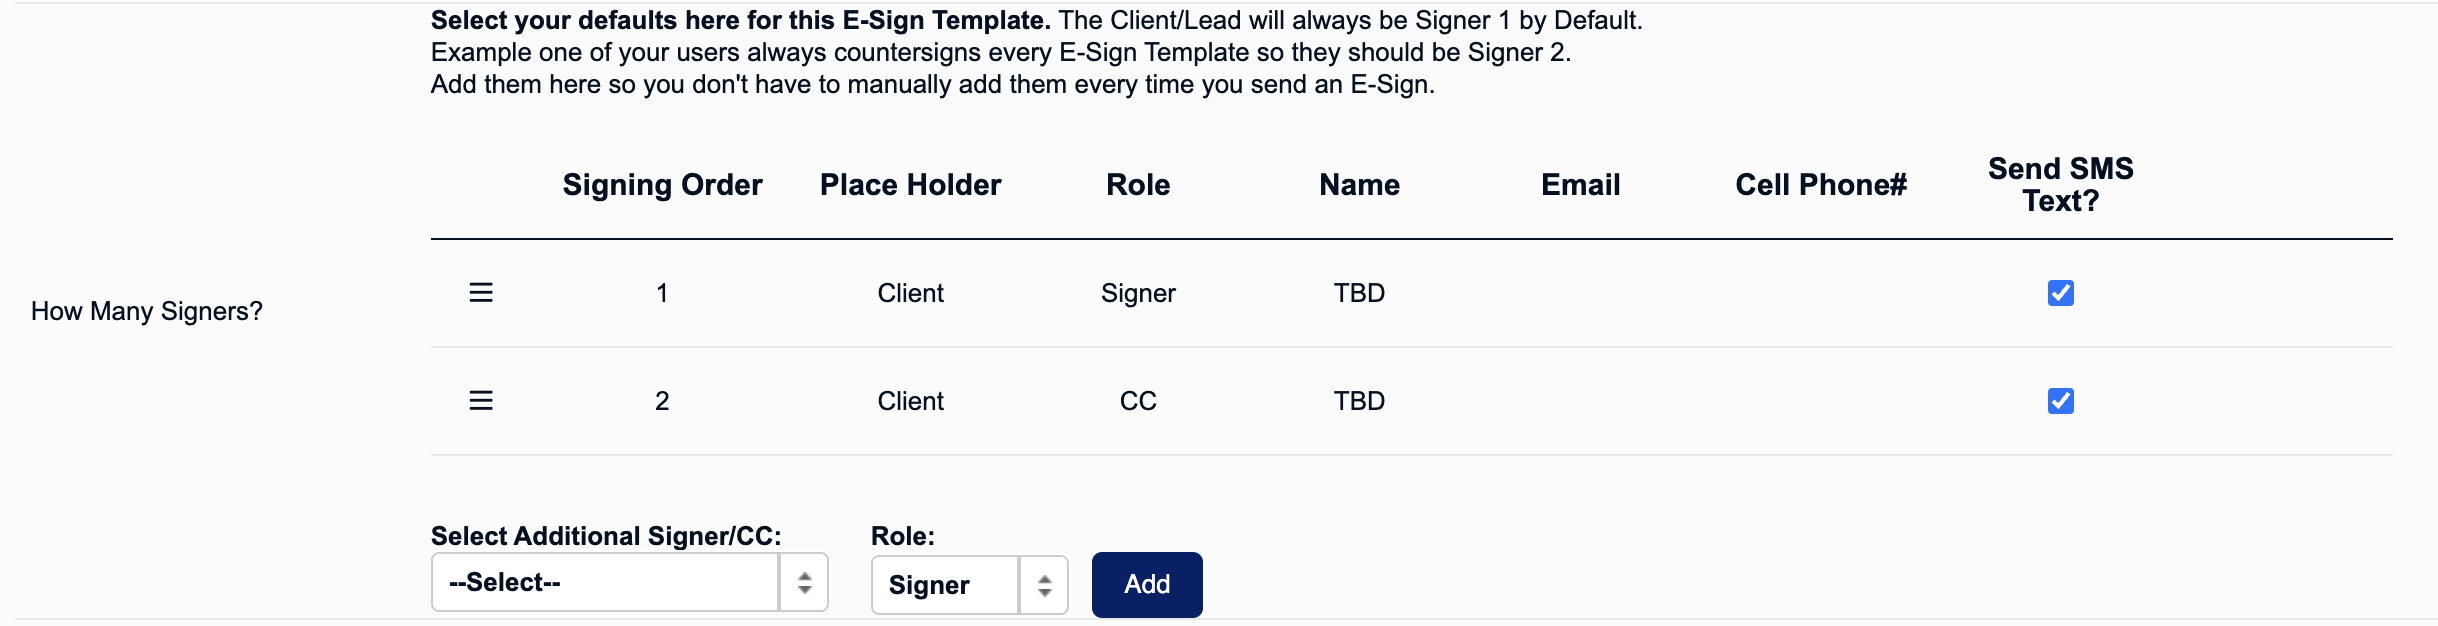
- Next you'll specify the number of signers in the How Many Signers? section. This is also where you can configure CCs. A CC is a recipient who should receive a copy of signed e-signs that are processed. By default, the client will always be set as the first signer (Signer 1) and as a CC.
- To add a signer, use the "Select Additional Signer/CC" dropdown to choose a specific user or role. Next, select the "Signer" option from the Role dropdown and click the "Add" button.
- To configure CCs to receive a copy of completed e-sign documents, select the CC option from the Role dropdown and click the "Add button.
⚠ Important Note: The number of signers can only be modified when first setting up an e-sign template. This means that once the template is created, you will not be able to add or remove signers.
If you know that your e-sign template will need an additional signer or CC, but you don't know who that person is yet, or that person could change on a case-by-case basis, choose the "Other" option from the "Select Additional Signer/CC dropdown. This will allow you to set a placeholder value when initially configuring your template. This placeholder value can then be modified on the fly before sending the e-sign to a lead.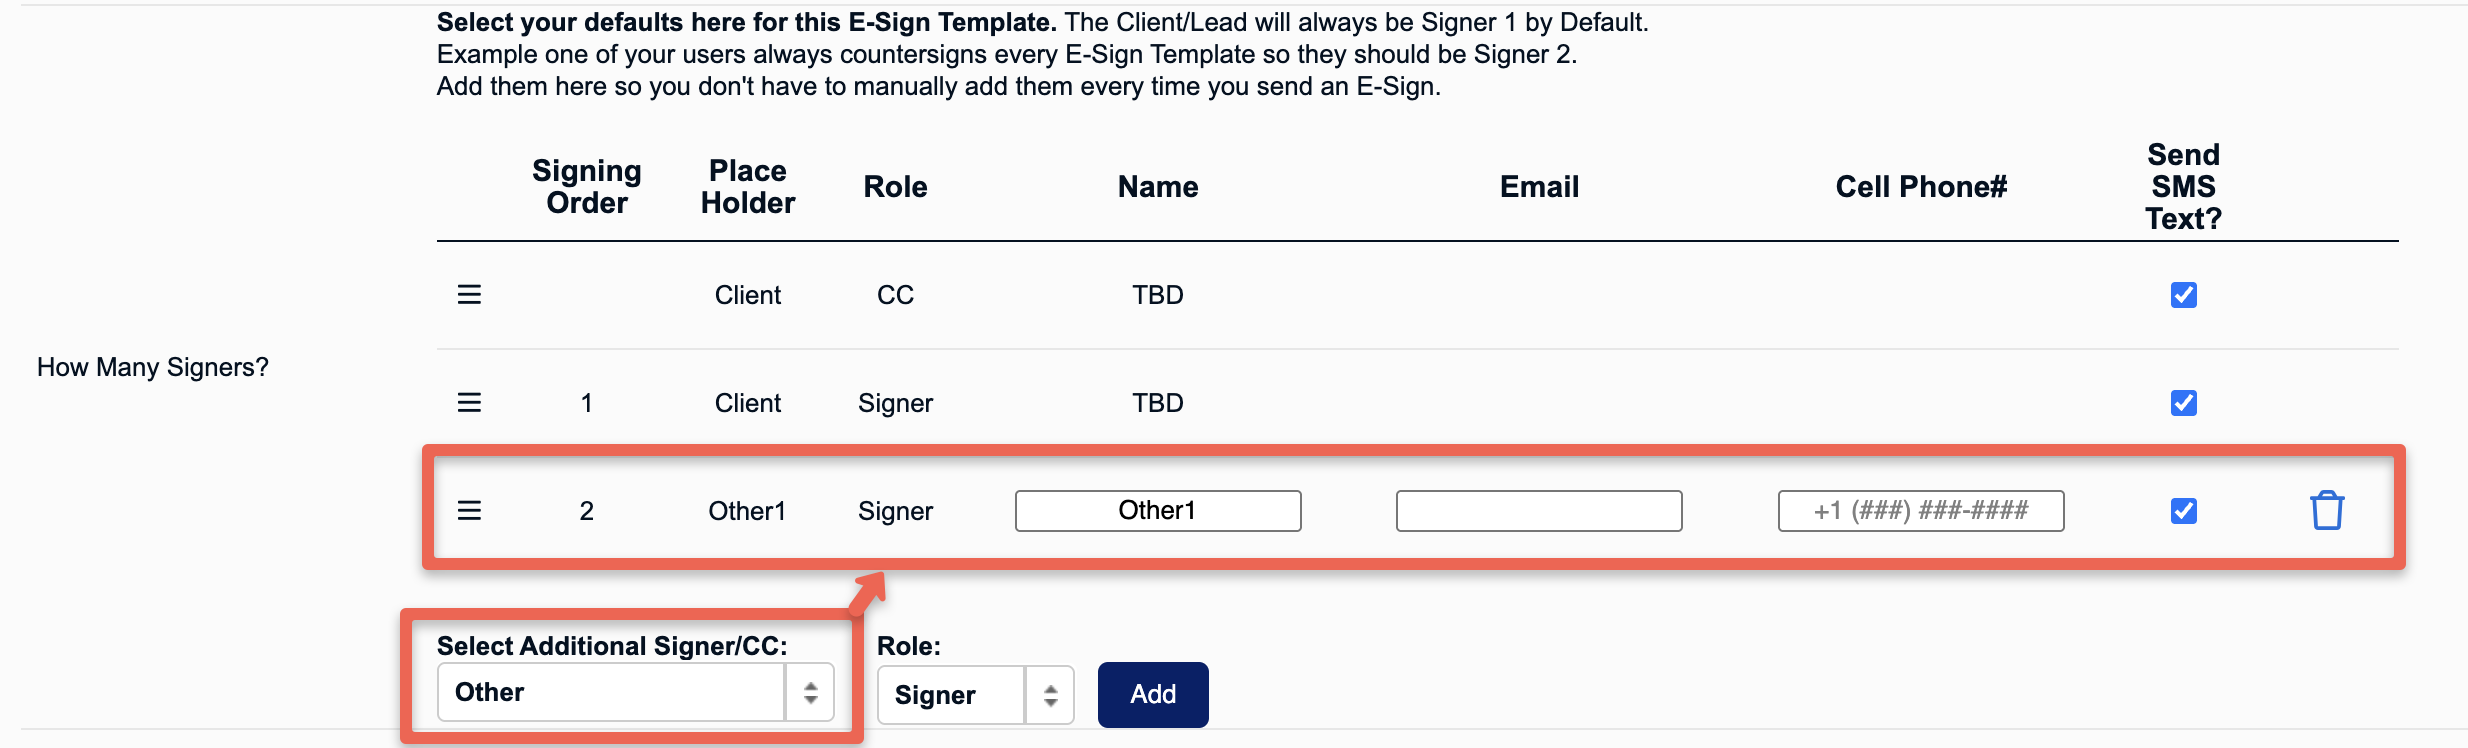
Step 4: Signing Options and Restricting the Template by Source or Case Type (Optional)
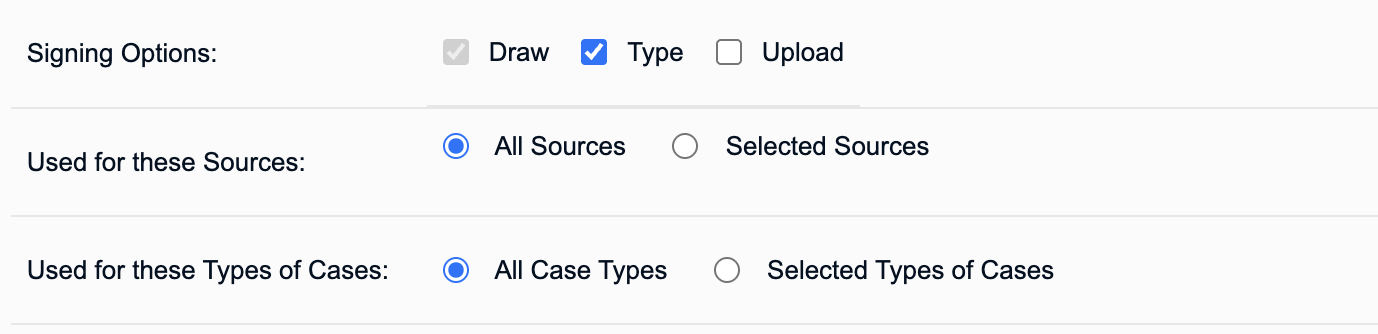
The Signing Options section allows you to choose the signing options that will be available to the signer. By default, the Draw signing option will be selected and cannot be removed.
- The Type option allows the signer to type their signature
- The Upload option allows the signer to upload an image to use as their signature
If the e-sign template applies only to certain marketing sources or case types, you can set those restrictions in the Used for these Sources and Used for these Types of Cases sections.
Step 5: Select Fields
Next, select the fields that will be used to pull data from the CRM into your e-sign.
You can select case type-specific fields by clicking the "Choose Additional Case Types" button and selecting the case type(s) where the desired fields are configured.
You can also select from a list of global and default system fields under the All Case Types/Global Fields section.
⚠ Note: You must select at least one field for the e-sign template.
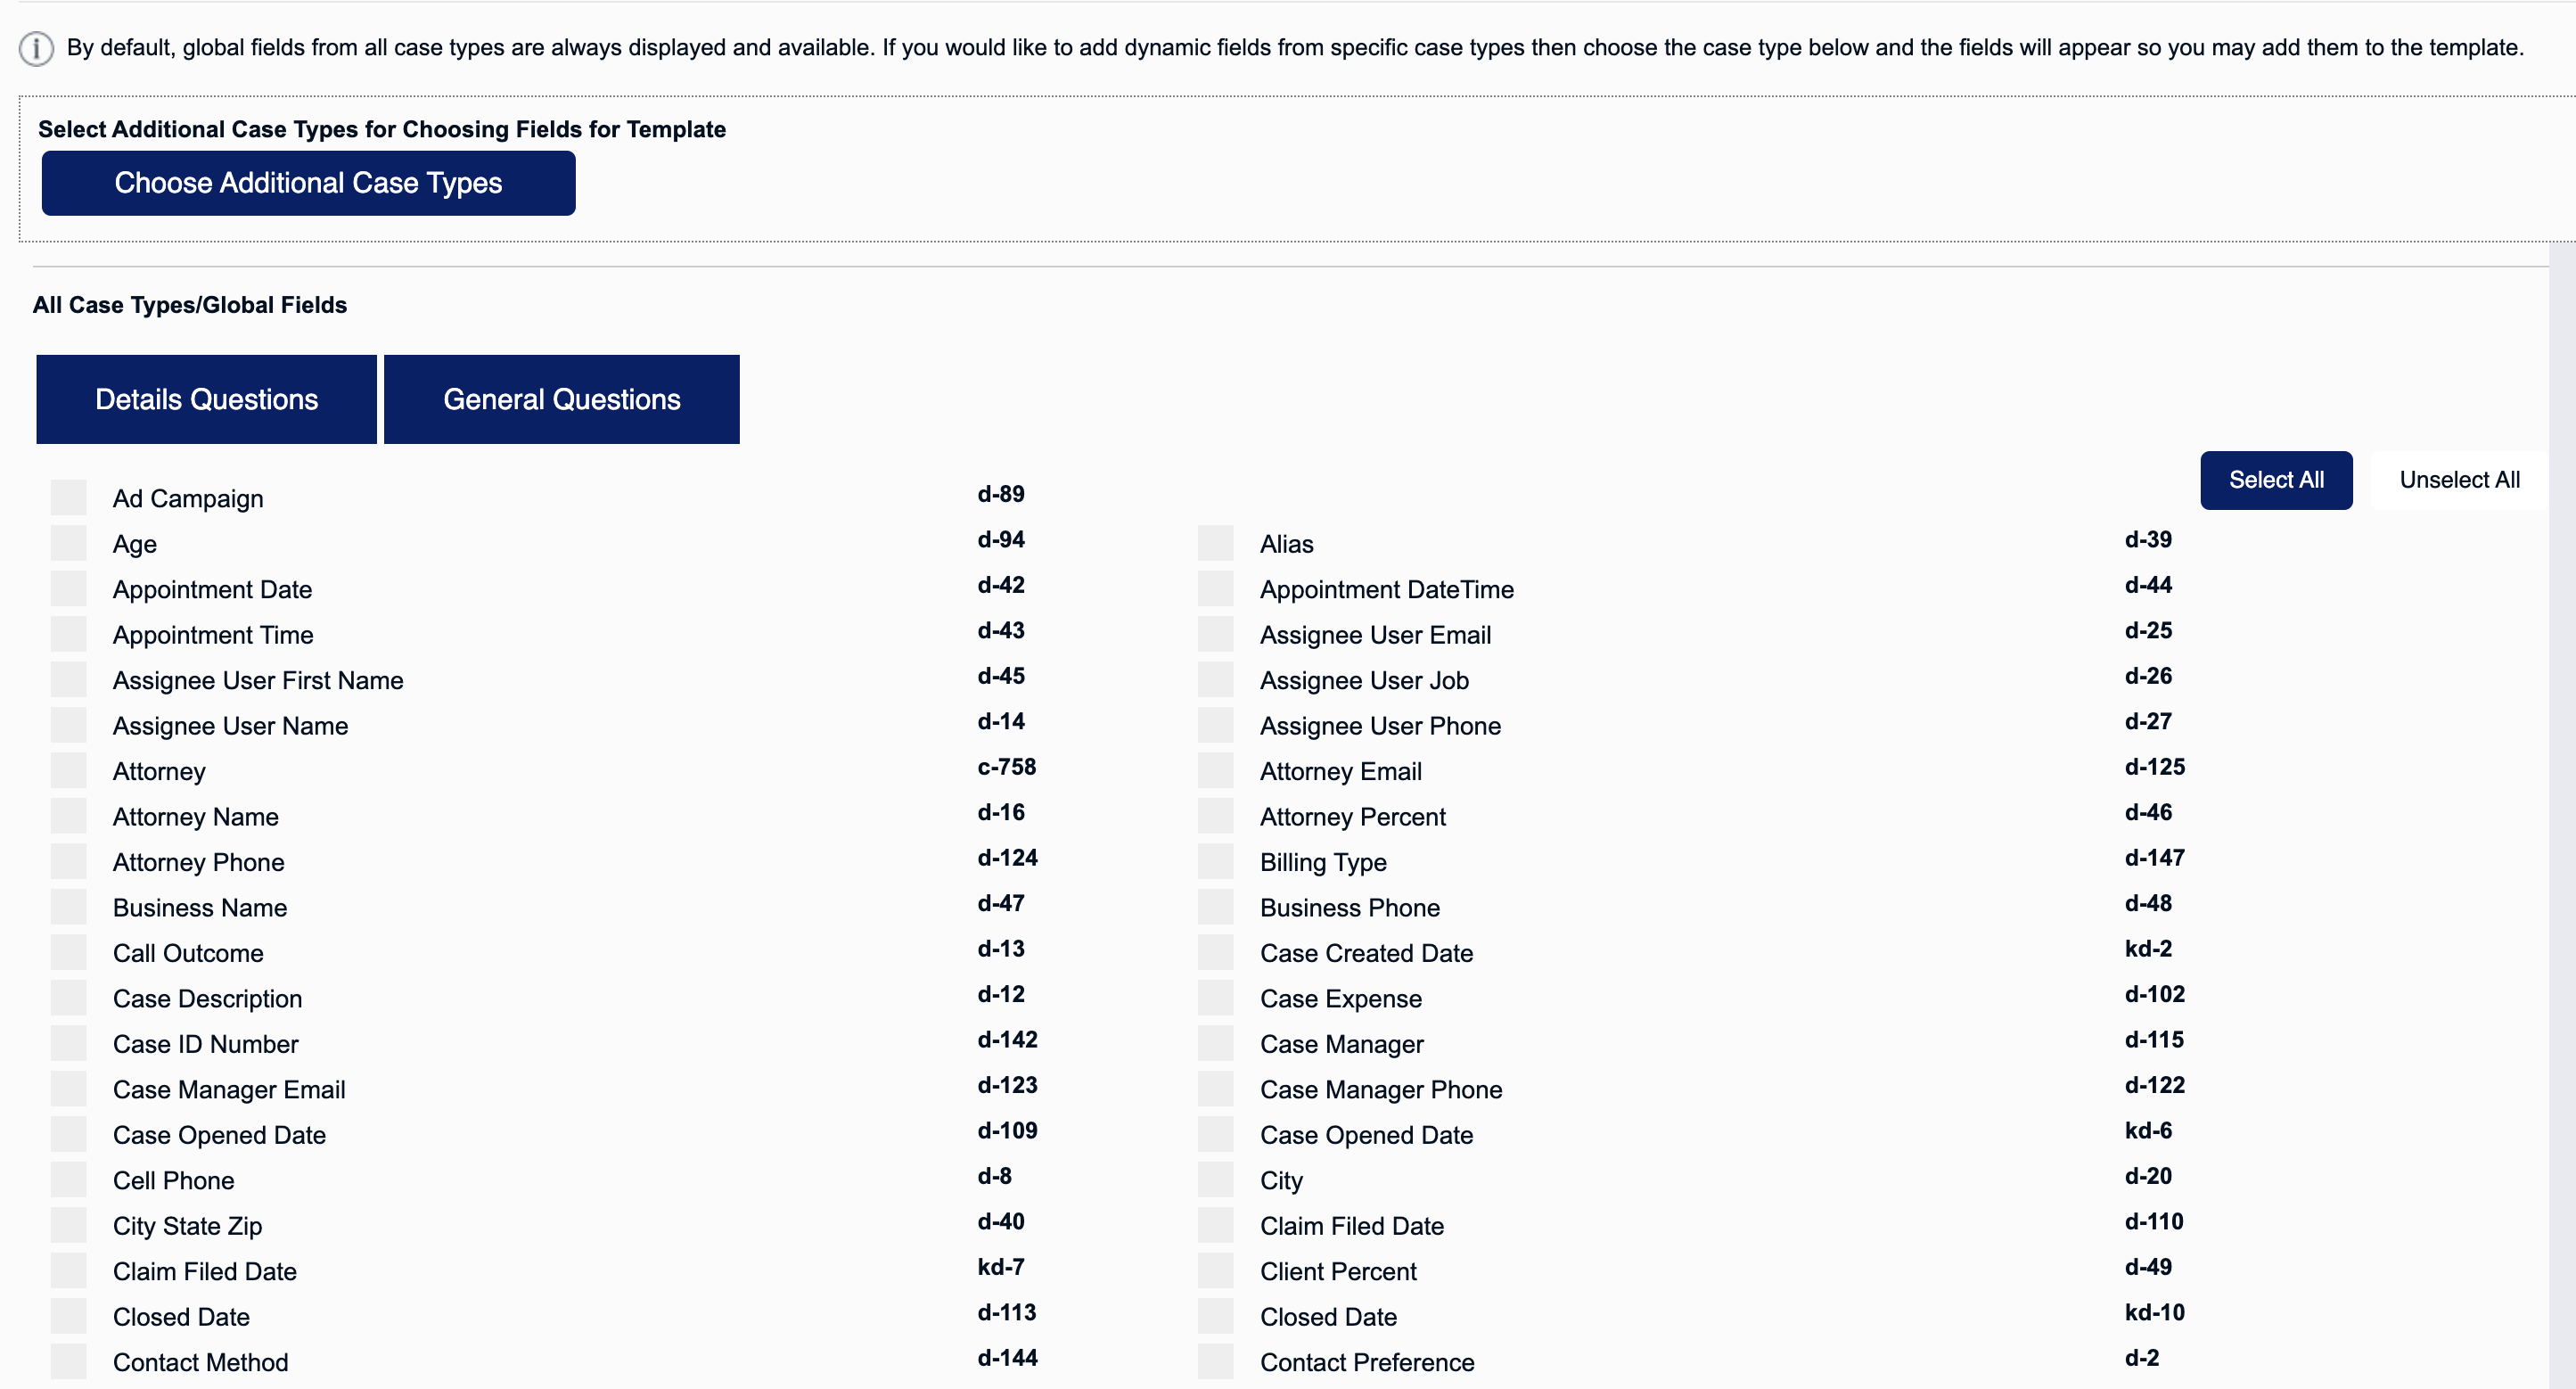
After making your field selection, scroll down to the bottom of the page and click the "Next" button to open the Dropbox Sign point-and-click editor.

Step 6: Configure the Document in Dropbox Sign Editor
A new screen will appear, showing the file you uploaded in the point-and-click e-sign editor. This is where you'll add any necessary fields to the e-sign template.
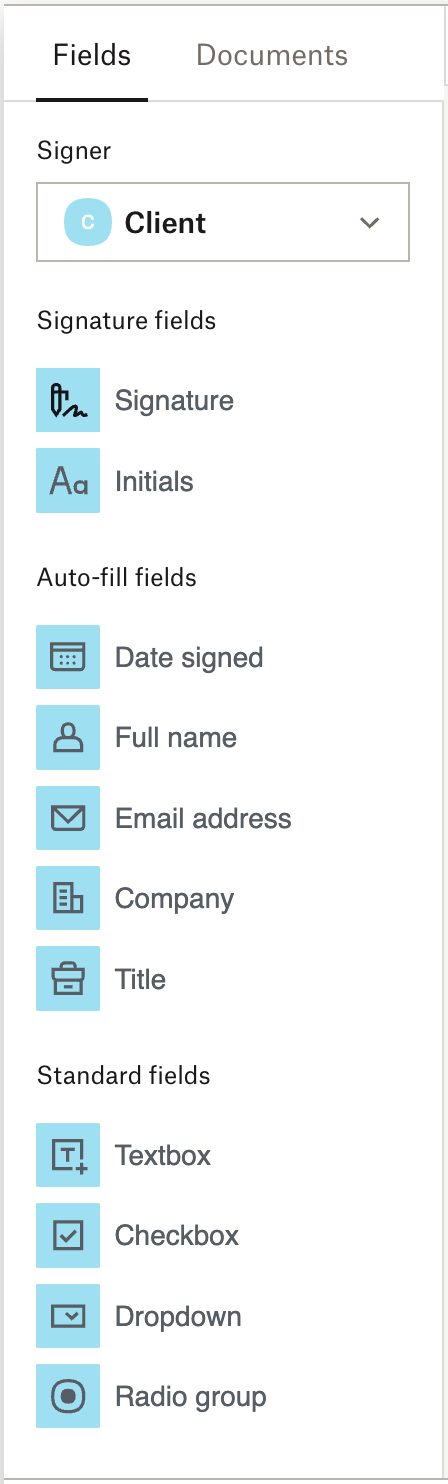
On the left side, you'll see a sidebar menu of various fields that can be inserted into your e-sign. To add a field, click and drag it from the menu to the desired place on the document.
We've included a breakdown of the field categories below.
Signature fields
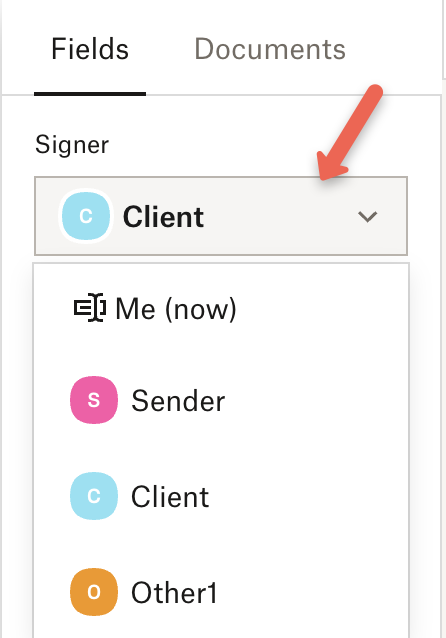
You can add Signature and/or Initials fields to the e-sign. If your template has multiple signers, you can select which signer to assign the signature/initials field to by using the Signer dropdown at the top of the left sidebar.
Auto-fill fields
These fields will auto-fill specific information. For example, the Date Signed field will auto-fill the date when your recipient signs the document.
⚠ Important Note: The rest of the auto-fill fields will require the signer to enter that field's information once. Then, the entered information will auto-fill any subsequent fields of the same type.
Standard fields
These fields pull information from the CRM and can also be used to hardcode specific information into the e-sign template.
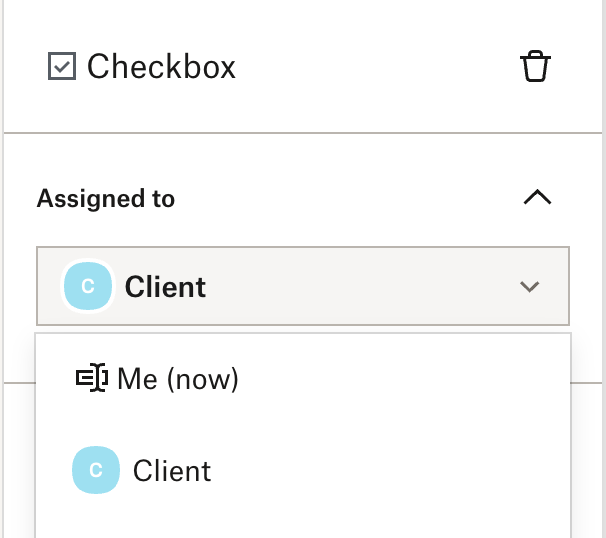
For example, let's say you add a Checkbox field to your document. Using the Assigned to dropdown that will appear on the right side, you can assign the checkbox to Client for the signer to fill out. Alternatively, you could assign the checkbox to Me (now) to hardcode the value of the Checkbox as checked.
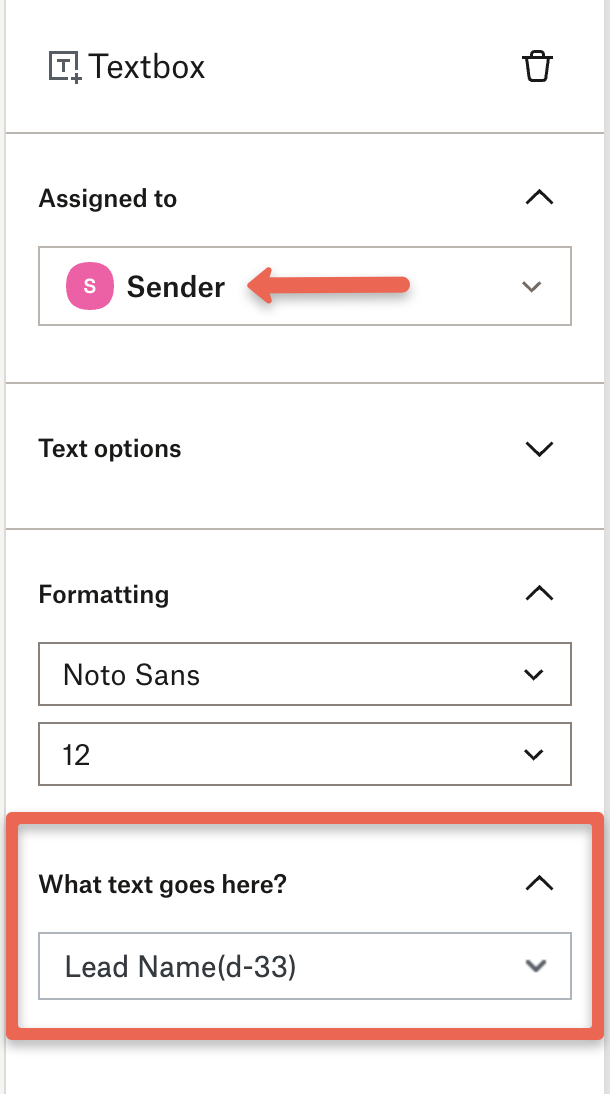
To insert fields that will pull lead information from the CRM, you must add Textbox fields.
Once a textbox field is added to the e-sign, use the Assigned to dropdown and select the Sender option.Then, choose the field that should auto-fill there by using the What text goes here? dropdown.
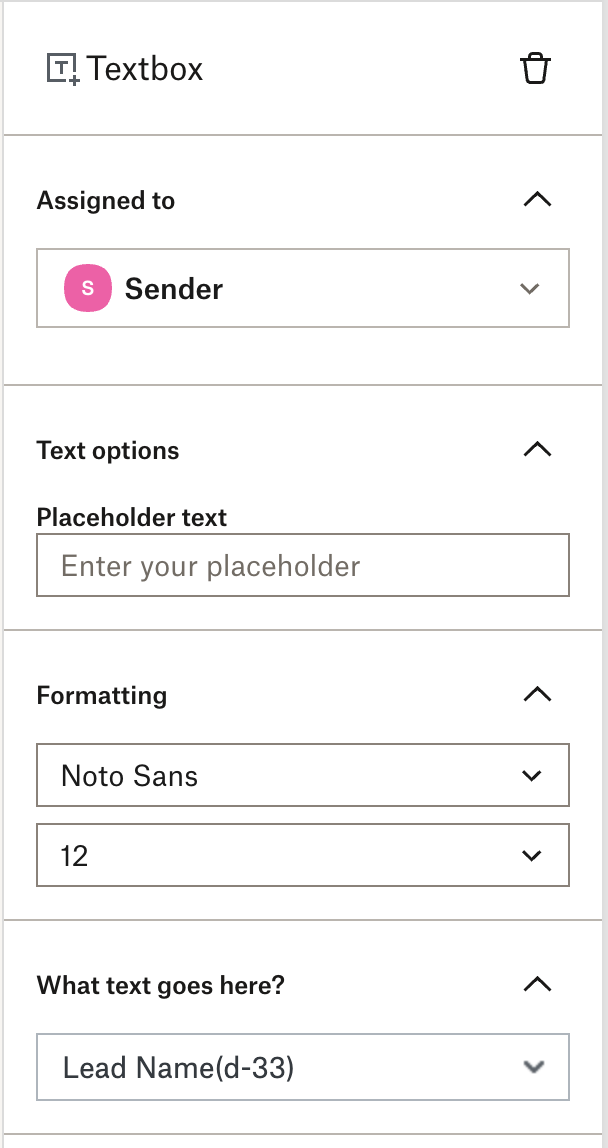
For any fields added to the e-sign, the right-hand side will show additional modifications that can be made to your fields, such as changing font size, field requirements, and more.
Once you are done setting up your template, click the Save Template button in the lower right-hand corner to save your finalized e-sign template.
How to Edit/Delete Existing Templates
Editing a Template
If you need to edit the name of your template, CCs, or the fields in your document, you can do this using the e-sign editor.
From the main E-Sign Settings screen, click the pencil icon next to the e-sign template you need to edit.

Removing & Adding CCs
To remove any existing CCs, go to the How Many Signers? section and click the trash can icon to the left.

To add new CCs, use the Select Additional Signer/CC dropdown to choose a specific user or role and then click the Add button.

Modifying Selected Fields
⚠ Note: If you make updates to the selected fields, particularly if you unselect any fields, you must remove or reassign the field you used on the template builder screen as well.
Once you've made the necessary changes, scroll to the bottom of the screen and click the Next button. If you need to update the fields that have been placed on the e-sign, this will be done on the following screen that appears, the point-and-click e-sign editor.
After making the required modifications to your template, click the Save Template button in the lower-left corner to save your modified template.
Updating the File for an E-Sign Template
If you need to change the uploaded file that is being used for a template, click the gear icon.

In the pop-up that appears, you can download the current file being used and/or upload a new file.
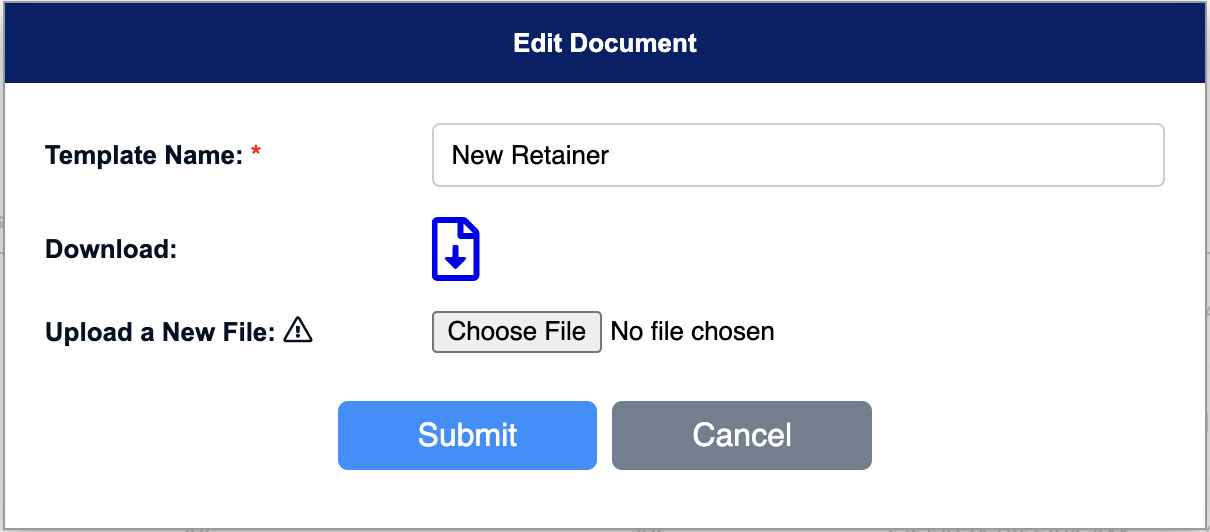
⚠ Note: If you are uploading a new file, the new file must be the same number of pages as the original document. If it is not, the template will fail to save, and you will have to reconfigure your template from scratch.
Click the Submit button in the pop-up to save changes when you are done.
Deleting a Template
To delete an e-sign template, click the trash can icon.

⚠ Important Note: This action cannot be undone, so please be cautious when deleting templates. In addition, even if you delete a template, this will not affect previously sent e-sign requests. Your recipients can still complete any previously sent e-signs.