To help you keep all your tasks organized and meet deadlines, you can create a workflow for a matter with a set of customizable triggers that enable you to automate key actions based on specific events, ensuring that no critical step is missed.
Note: Please check your tier for availability of the feature.
Watch a Video
Create a Workflow
To create a workflow:
- From the left navigation panel, click Practice.
- From the Practice menu, click Workflows.
- On the Workflows screen, click +Add Workflow.
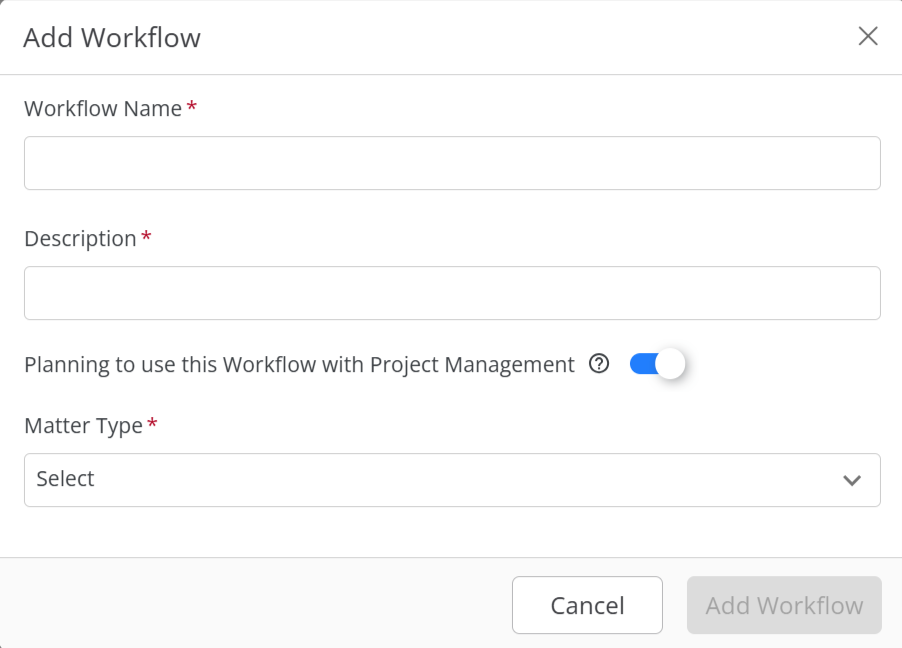
- In the Add Workflow window that opens, enter a Workflow name.
- Enter a description for your workflow.
- If you wish to use this workflow with Project Management, enable the toggle button.
Note: This option will only appear if you have enabled project management for your firm.
This will allow you to utilize the statuses to trigger tasks and events in the matter type you choose.
- Click Add Workflow.
You can now add tasks and events to the workflow using the + icon.
Note: The workflow will be triggered when it is assigned to a matter.
Configure Tasks on a Workflow
To add tasks to the newly created workflow: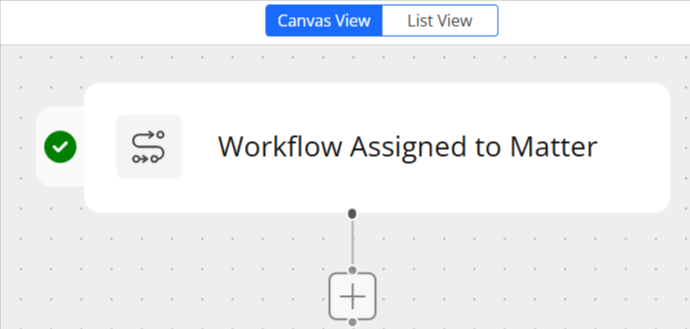
- Click the + Add icon below Workflow Assigned to Matter.
- From the Add Action menu, select Task.
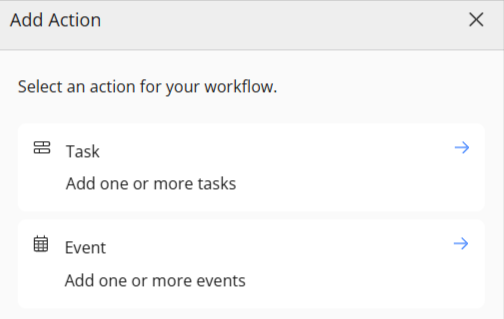
- In the Configure Task pane, fill out the fields.
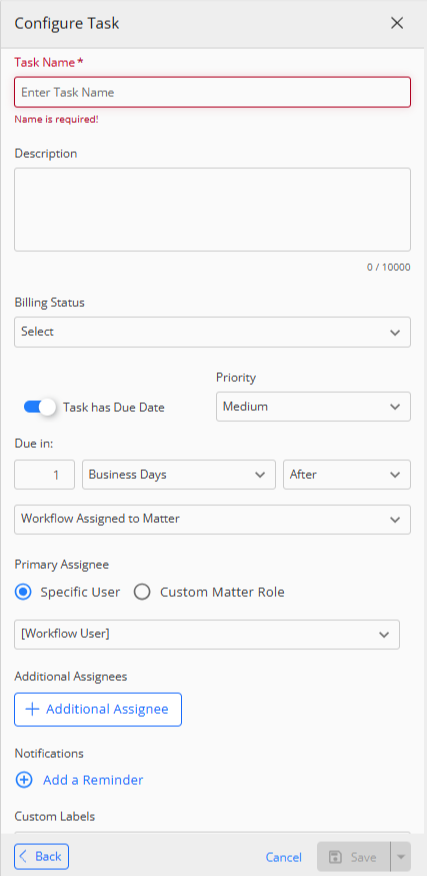
Configure Task Screen Fields
Task Name Enter a name for the task you are configuring Description Give an appropriate description to the task for the reference of the assignees. Billing Status You can choose to make the task billable, non-billable, no charge, or billed. Task has due date If you wish the task to be accomplished in a specified period of time, toggle the button on. Priority Choose from high, medium, or low. Due In Days
Before/After
Specify the number of calendar/business days in which the task needs to be completed. Choose from before/after the task list in the drop-down below.
Note: You can choose the dependency from the due date or the complete date of the previous item.
Assignee - Specific Assignee: Select a specific assignee from the drop-down.
- Custom Role: Select a custom role that was created when Customizing Your Drop-down Menus (List Items)
Additional Assignee You can add additional assignees to the task for specific and custom role, if desired. Notifications Clicking this will allow you to add a reminder Custom Labels You can choose to select a label from the drop-down or add one of your own. - Once you have entered all the relevant fields, click Save.
Your task will be added to the workflow and be triggered when the workflow is assigned to a matter.
- To edit or delete the task, click on the three dots and from the drop-down, select the relevant option.
Note: Deleting a stage will also delete all stages that are solely dependent on it. Make sure to move those tasks and events to be dependent on other tasks before deleting.
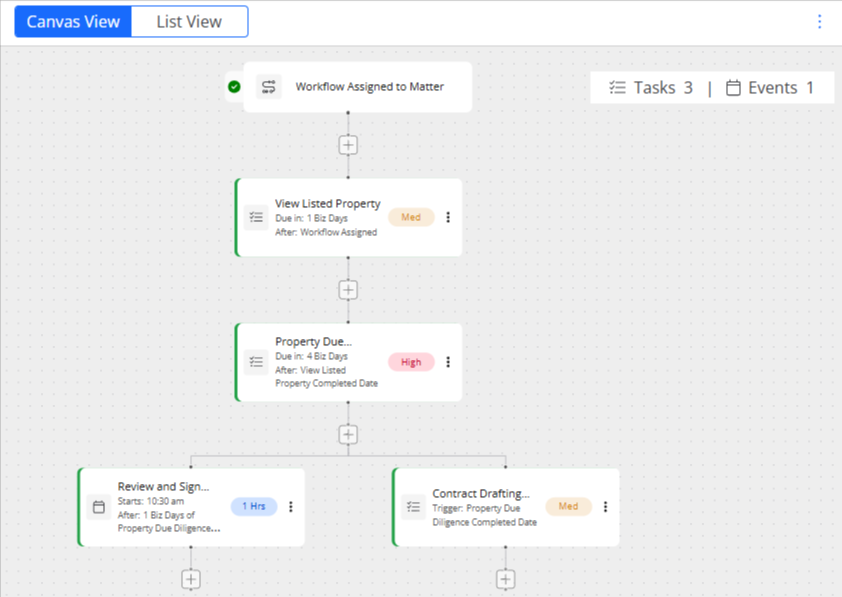
Configure Events on a Workflow
- Click the + Add icon below Workflow Assigned to Matter.
- From the Add Action menu, select Event.
- In the Configure Event pane, fill out the fields.
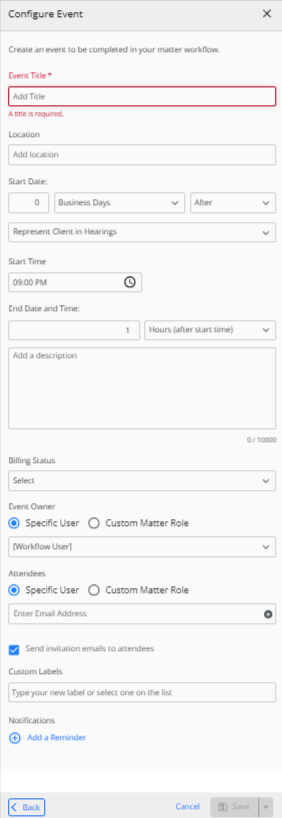
Configure Event Screen Fields
Add Title Enter a name for the event Add Location Enter the location of the event Start Date Start Time Enter the start date and time End Date and Time Enter the date and time when the event ends Add a Description Give an appropriate description if desired. Billing Status You can choose to make the event billable, non-billable, no charge, or billed. Event Owner Assign the event owner: - Specific Assignee: Select a specific assignee from the drop-down.
- Custom Role: Select a custom role that was created when Customizing Your Drop-down Menus (List Items)
Attendees Add attendees if desired: - Specific Assignee: Select a specific assignee from the drop-down.
- Custom Role: Select a custom role that was created when Customizing Your Drop-down Menus (List Items)
Send Invitation Emails to Attendees Check the box if you wish emails to be sent to the attendees Custom Labels You can choose to select a label from the drop-down or add one of your own. Notifications Clicking this will allow you to add a reminder - Once you have entered all the relevant fields, click Save.
Your event will be added to the workflow and be triggered when the workflow is assigned to a matter.
- To edit or delete the event, click on the three dots and from the drop-down, select the relevant option.
Note: Deleting a stage will also delete all stages that are solely dependent on it. Make sure to move those tasks and events to be dependent on other tasks before deleting.
Manage Your Workflow
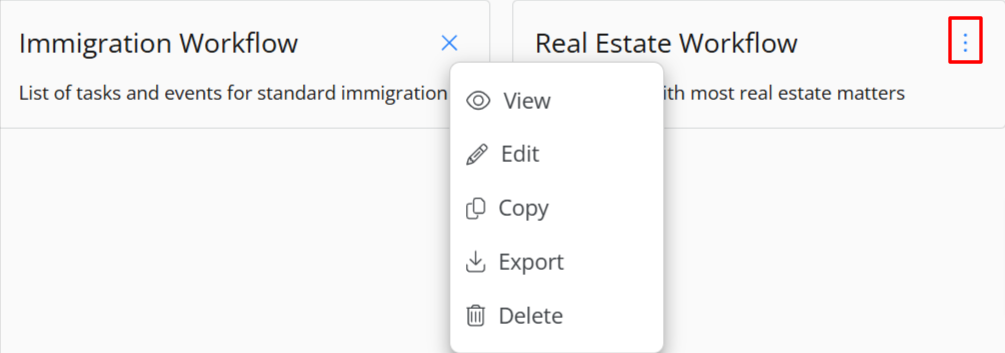
To make changes to a workflow, click on the three dots on the specific workflow where you want to make changes and from the drop-down select the appropriate action.
| View | Clicking view will allow you to see all the tasks and events assigned to the specific workflow |
| Edit | Clicking edit will allow you to rename the workflow, change its description and use Project Management triggers and actions. |
| Copy | If you copy the workflow, you can use all the tasks and events of the existing workflow and create a new one. |
| Export | Clicking Export will download a copy of the workflow to your machine |
| Delete | If you wish to remove the workflow from your list, you can select delete. You will need to acknowledge the confirmation message by clicking Yes.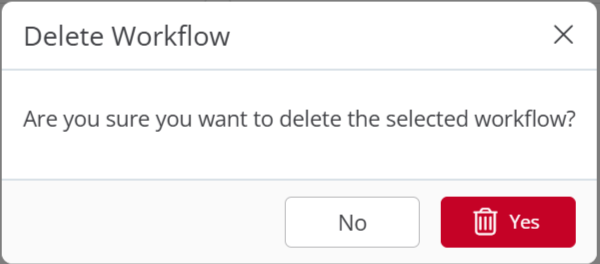 |
Import a Workflow
Note: Only JSON file format workflows can be imported into the system.
To import a workflow:
- From the left navigation panel, click Practice.
- From the Practice menu, click Workflows.
- On the Workflows screen, click Import.
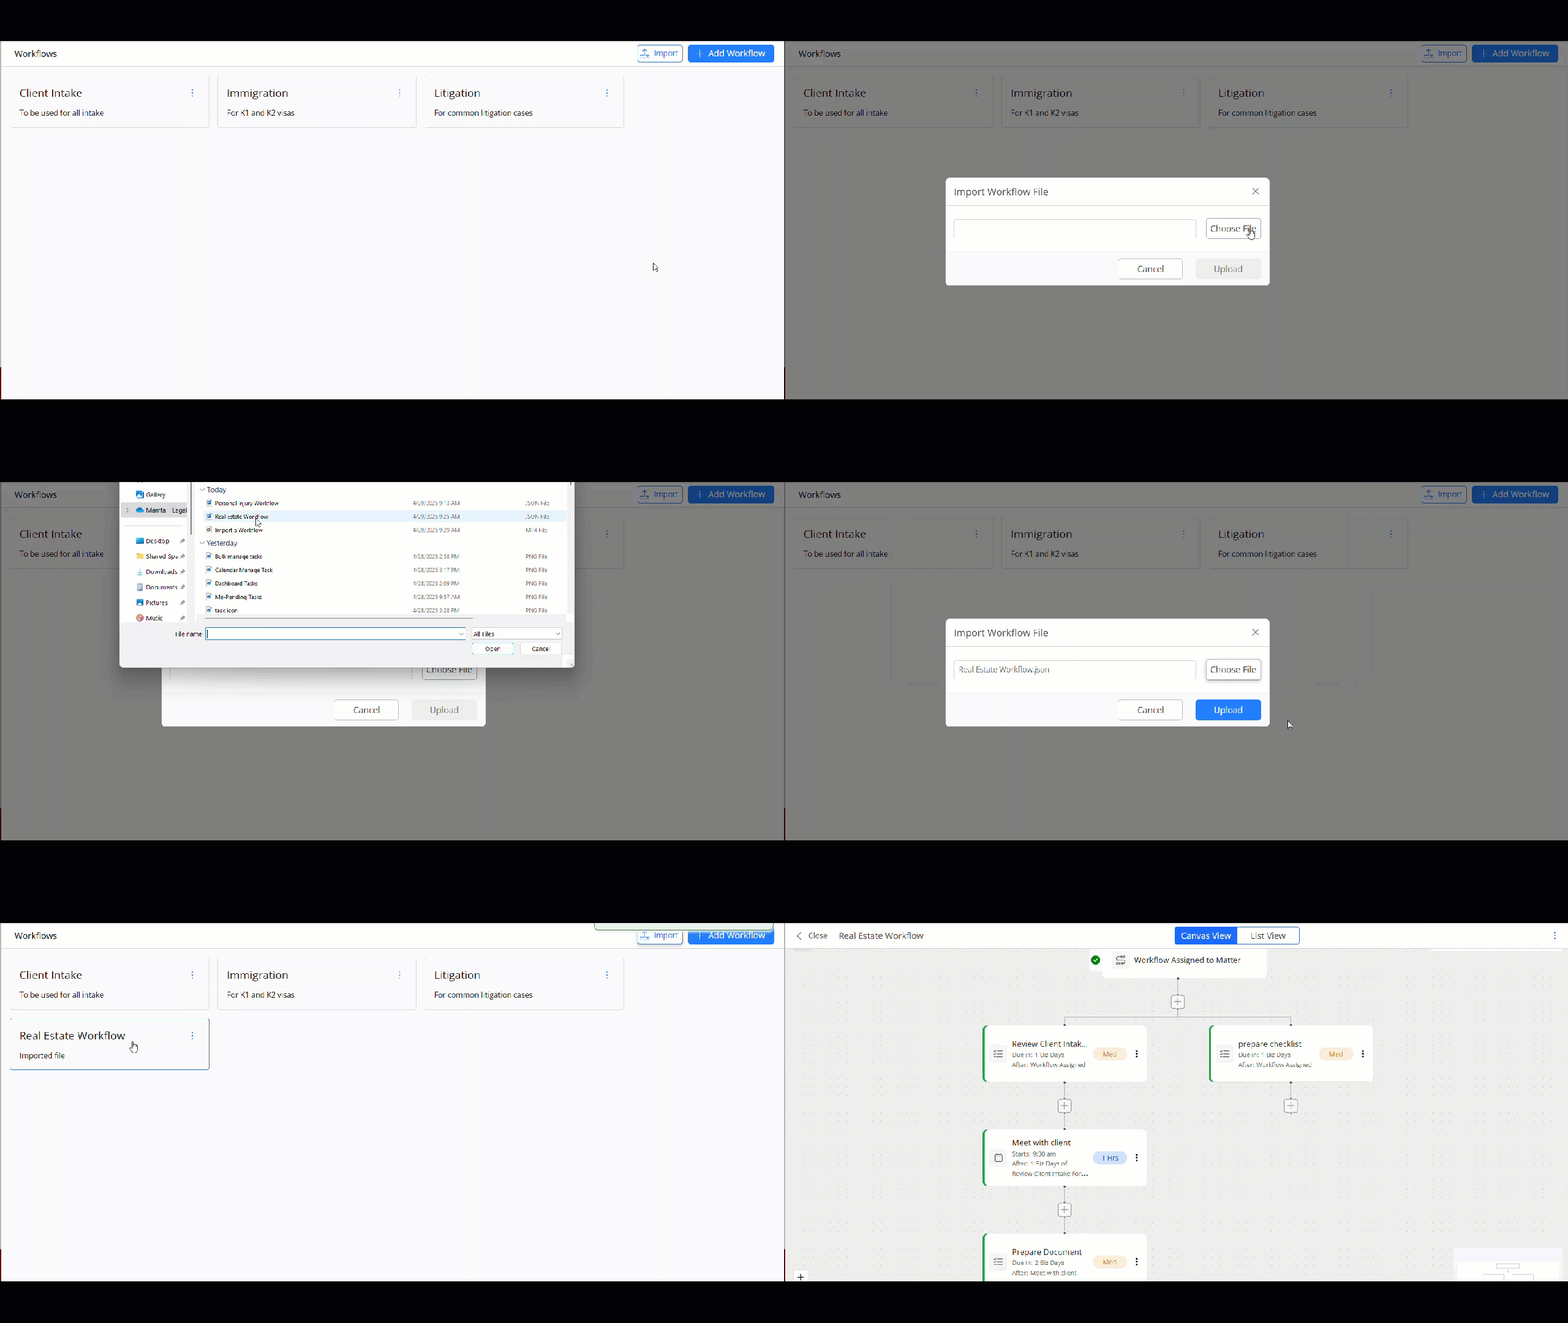
- From the files saved on your system, choose the file you wish to import.
Note: Only JSON file formats can be imported into the system.
- After selecting your file, click Upload.
- Your selected workflow with all its statuses and triggers will be imported into the application.
Also read: Apply a Workflow to a Matter